Create a scripted SharePoint 2013 Development Environment Tutorial – Part 4
 By Vlad Catrinescu Microsoft MVP and MCT · Pluralsight Author
Introduction
Creating a SharePoint Development Virtual Machine is something you might have to do quite a few times as a Developer. Even if it’s a pretty easy process, on a slow machine it can easily kill 4-5 hours of your day only to install SQL, SharePoint, Visual Studio and all the others tools you might need to get started. What if you could just script it so it’s all done automatically while you go take coffee, chat on SharePoint Community (opens in a new tab) or whatever else you enjoy doing? In this tutorial we will learn how to build a script that we will keep using for as long as you keep developing on SharePoint 2013. The tutorial will be split in a few sections since in order to keep them focused and short, and at the end they will all be published in a downloadable PDF. I strongly encourage you to not only copy the scripts, but actually read the blog posts of why I did them like this and there are some parts where you will need to work as well!
Sections:
- Introduction & Prerequisites & Creating the Domain and Service Accounts
- Installing software prerequisites + SQL
- Installing SharePoint 2013
- Installing Visual Studio 2012 and Optional Software
- Basic Optimizing and Summary
- Advanced Optimizing of the scripts! (You are here)
- An eBook Guide of the 6 sections and a video! (19/11/2013)
The Optional Software we will install!
- Microsoft SharePoint Designer 2013
- Google Chrome
- Firefox
- NotePad++
- Smtp4dev
- ULSViewer
- SharePoint Host named Site Collection (HNSC) Creator
Visual Studio 2012 Installation
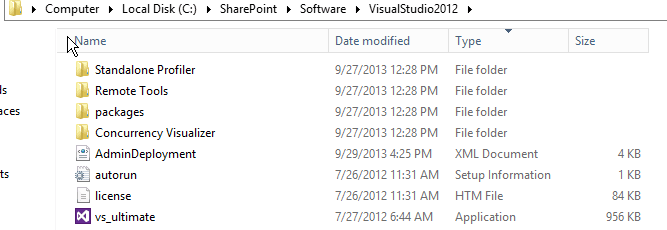
It’s no secret that the only tool we really need for SharePoint Development is Visual Studio! In this part of the tutorial we will Install Visual Studio 2012, as well as the Office Developer Tools needed to develop on SharePoint 2013. First of all, we will copy all the Visual Studio Installation Bits from the ISO to a new folder in C:\SharePoint\Software\VisualStudio2012. We will put all the binaries from this chapter in C:\SharePoint\Software\ProgramName. This will make our structure a lot cleaner! It will look something like this:
Next, what we need to do is open the “AdminDeployment.xml” with a notepad editor and change
_

PS: First time it failed the installation because I entered “Yes” instead of “yes”. So make sure you enter everything in lowercase.
Then, open powershell and run the following command: (If you have Visual Studio Premium, the .exe name might change, so make sure you also change it in script!)
New-Item -ItemType directory -Path C:\AutoInstallLogs
cd C:\SharePoint\Software\VisualStudio2012
.\vs_ultimate.exe /full /noweb /quiet /ProductKey YKCW6BPFPFBT8C97DCTHQXGWC /Log C:\AutoInstallLogs\VS2012.txt
This Operation will take a while however, we will know when it’s done when it stops modifying files in the C:\AutoInstallLogs folder! I know it’s not the best way out here, however in part 6 we will see how to make it better!
Install the Office Developer Tools for Visual Studio 2012
This Process is divided in two steps: The first step is to actually download all the files, and the second step is to install them on a virtual machine! For the first step, you will obviously need an internet connection, however you can do it on any machine!
Downloading the Office Developer Tools Package
The first thing you need to do is go to the MSDN Website here: http://msdn.microsoft.com/en-us/office/apps/fp123627.aspx (opens in a new tab) and download the Microsoft Office Developer Tools for Visual Studio 2012 package.
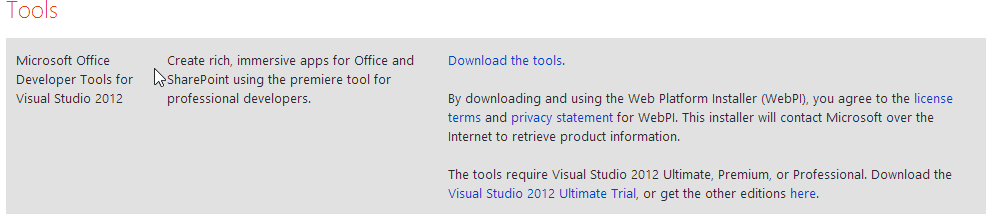
Once it’s downloaded, open it with the GUI at least once, so it installs the latest version of the Web PlatForm Installer (4.6 at the time of this writing). As soon as the WPI window opens, close it! Afterwards, run this PowerShell command!
WebpiCmd.exe /offline /products:OfficeToolsForVS2012RTW /Path:C:\SharePoint\Software\OfficeToolsForVS2012RTW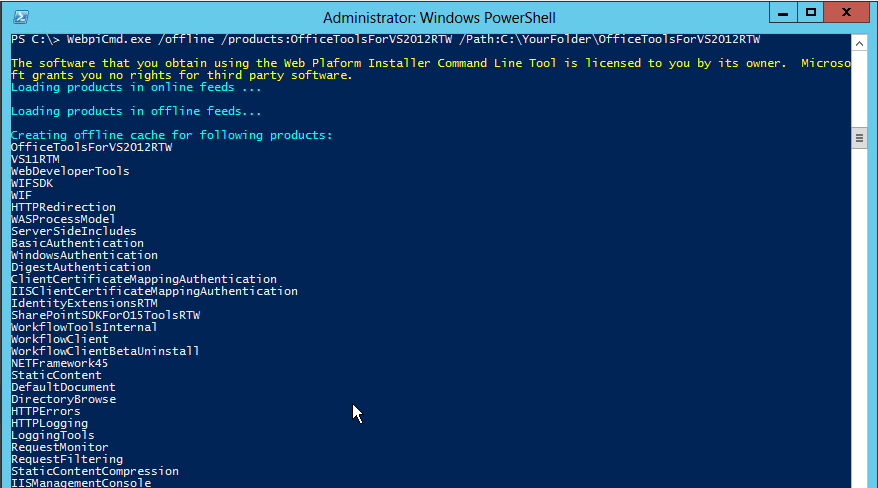
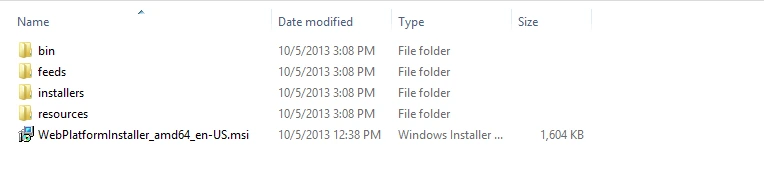
It will download a bunch of files and will put them into folders pretty cleanly! Also, by default, the WebPlatForm Installer commands are not installed, and if you don’t have an internet connection, you might get a nasty error! So what we will do is download the WebPi binaries from here: http://www.iis.net/learn/install/web-platform-installer/web-platform-installer-v4-command-line-webpicmdexe-rtw-release (opens in a new tab) (Direct Download: http://download.microsoft.com/download/7/0/4/704CEB4C-9F42-4962-A2B0-5C84B0682C7A/WebPlatformInstaller_amd64_en-US.msi (opens in a new tab) )
Installing Microsoft Office Developer Tools for Visual Studio 2012
Now, Run the following Command in order to install it! The first 2 lines are only for “Future” Virtual Machines to make sure they install the newest Web Platform Installer and you don’t need to run them on this one!
C:\SharePoint\Software\OfficeToolsForVS2012RTW\WebPlatformInstaller_amd64_en-US.msi /q
Start-Sleep -s 120
C:\SharePoint\Software\OfficeToolsForVS2012RTW\bin\WebpiCmd.exe /install /products:OfficeToolsForVS2012RTW /XML:C:\SharePoint\Software\OfficeToolsForVS2012RTW\feeds\latest\webproductlist.xml /AcceptEula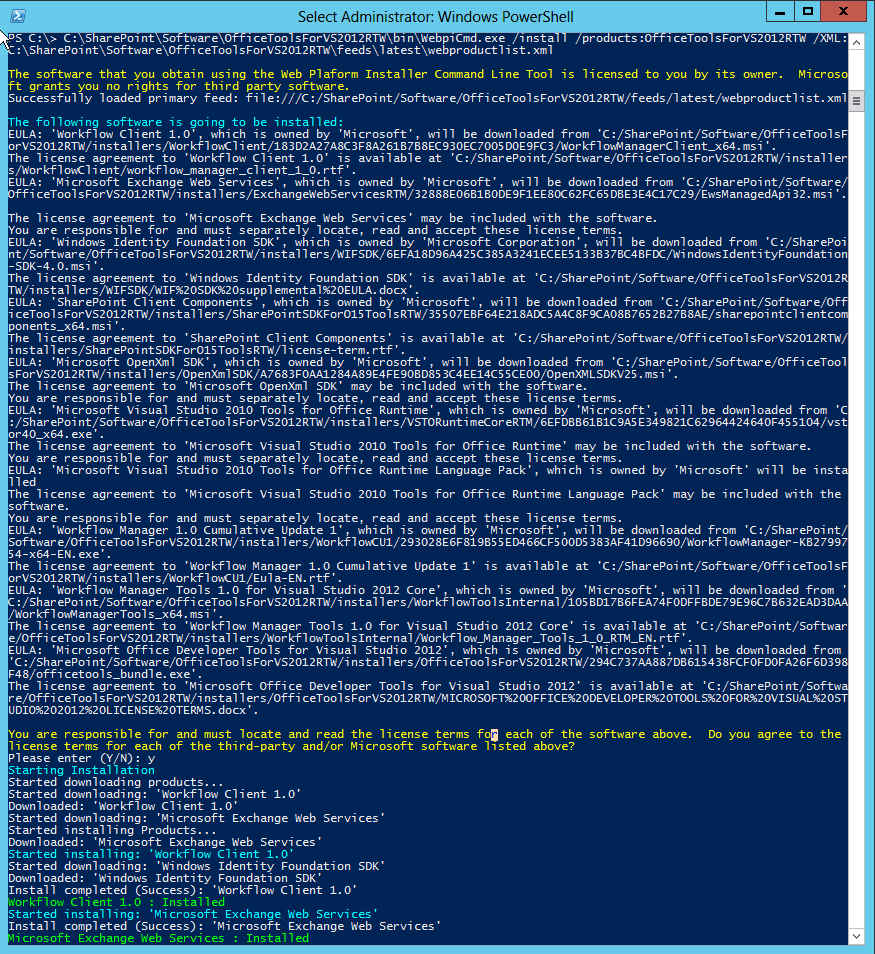
Once everything finishes installing, it will look something like this:
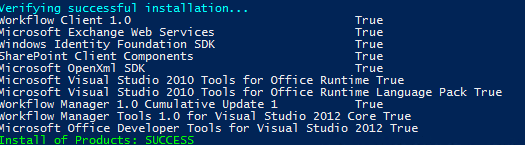
Note: This tutorial was done and tested with version 4.6 of the Web Platform Installer. If you ever have errors with an older version, please tell me and I will update the article!
NotePad++
To Install NotePad++, download the Notepad++ installer file from http://notepad-plus-plus.org/download/v6.5.html (opens in a new tab) and save it in C:\SharePoint\Software\NotePad++

Run the Following Command:
cd C:\SharePoint\Software\NotePad++
.\npp.6.5.Installer.exe /S
NotePad++ is now installed!
Chrome
To Install Chrome, download the Chrome MSI file from here http://www.google.com/chrome/eula.html?msi=true (opens in a new tab) and save it in C:\SharePoint\Software\Chrome
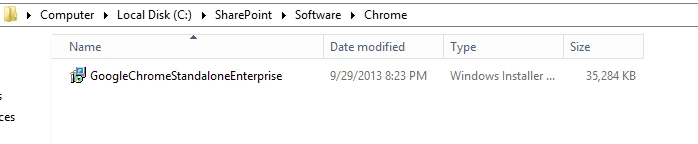
Run the following Command:
Cd C:\SharePoint\Software\Chrome
Msiexec /q /I GoogleChromeStandaloneEnterprise.msi
Google Chrome is now installed!
Firefox
To Install FireFox, download the full Executable Package of FireFox English Version from http://www.mozilla.org/en-US/firefox/all/ (opens in a new tab) and save it as an executable with no spaces (preferably) in C:\SharePoint\Software\FireFox
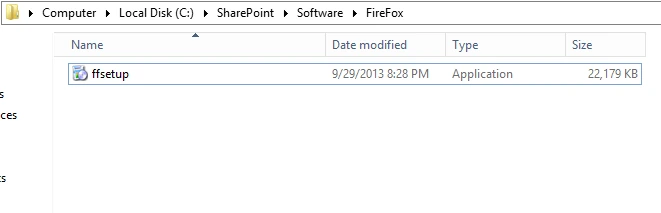
Run the following Command:
cd C:\SharePoint\Software\FireFox
.\ffsetup.exe -ms
FireFox is now installed!
Microsoft SharePoint Designer 2013
SharePoint Designer 2013 is probably the most complicated out of the optional software. First of all, download the 64 bit executable from http://www.microsoft.com/en-ca/download/details.aspx?id=35491 (opens in a new tab). Then, using PowerShell navigate to the folder where it was downloaded and run the following command:
.\sharepointdesigner_64bit.exe /extract:C:\SharePoint\Software\SPDesignerYou should now have something like this:
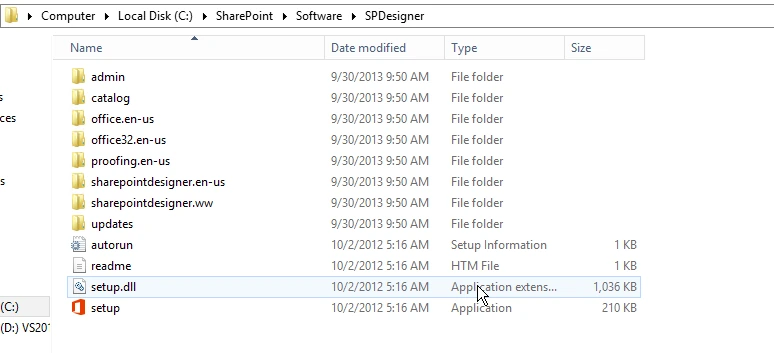
We will now go back to PowerShell and run the following command:
cd C:\SharePoint\Software\SPDesigner
.\setup.exe /admin
The Microsoft Office Customization Tool will open and ask us to select what file we want to prepare! We will chose the only available product we have!
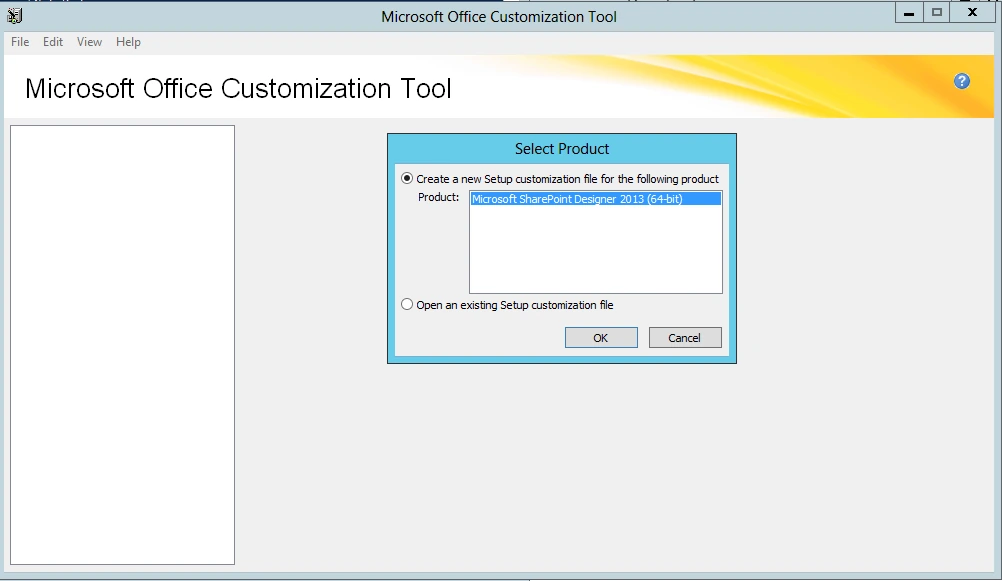
In the Setup > Licensing and user interface tab, select the “I accept the terms in the License Agreement” as well as set the display level to “None”
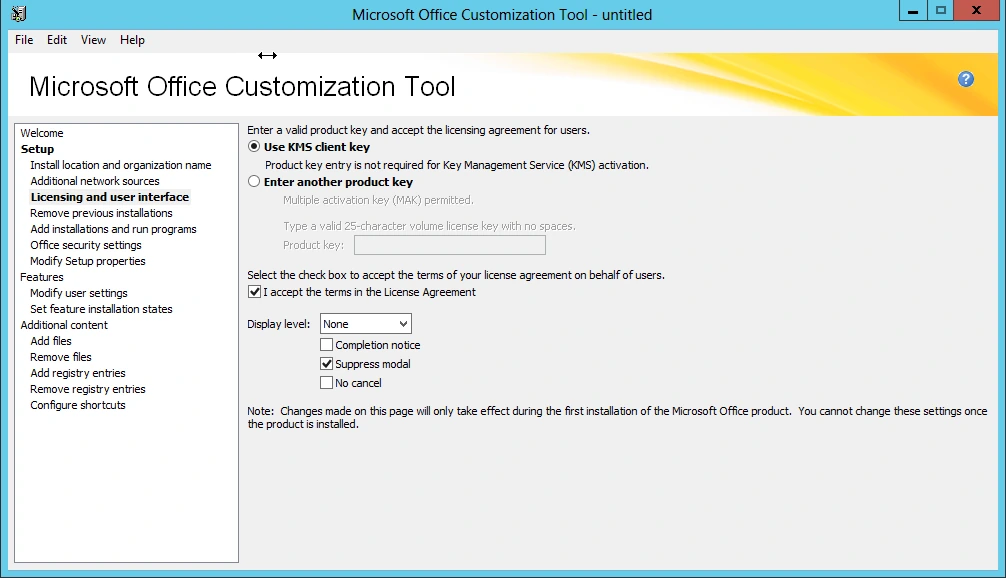
Afterwards, we will go to File > Save As, and we will save it in the C:\SharePoint\Software\SPDesigner\Updates folder and we will call it adminfile.msp !
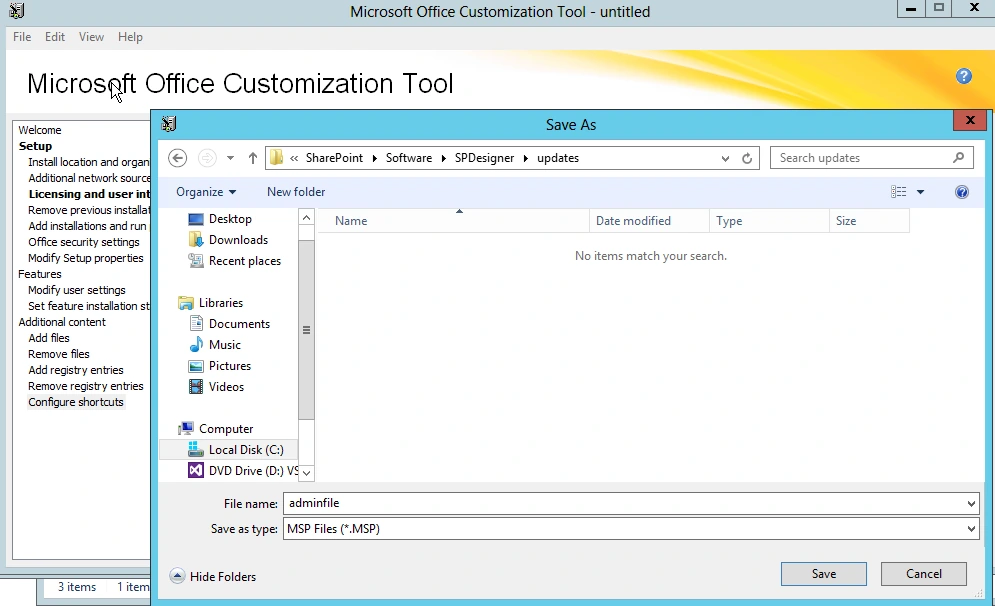
We will then open PowerShell and run the following commands:
cd C:\SharePoint\Software\SPDesigner
.\setup.exe /adminfile updates\adminfile.msp
SharePoint Designer 2013 is now installed!
SMTP4DEV, ULSViewer & HNSC Creator
The SMTP4Dev, ULSViwer and SharePoint Host named Site Collection (HNSC) Creator are “standalone” programs that do not require installation and that’s why I grouped them together! First of all, download all of them from the following links and paste the extracted executable in C:\SharePoint\Software\Standalone
- SMTP4DEV: https://smtp4dev.codeplex.com (opens in a new tab)
- ULSVIEWER : http://archive.msdn.microsoft.com/ULSViewer (opens in a new tab)
- SharePoint Host named Site Collection (HNSC) Creator: https://hnsc.codeplex.com/ (opens in a new tab)
It should then look something like this:

You can also add any other standalone program that you need! After we’re done, we will run the following command:
Copy-Item C:\SharePoint\Software\StandAlone\* C:\Users\sp_admin\DesktopIt will then look something like this on your desktop!
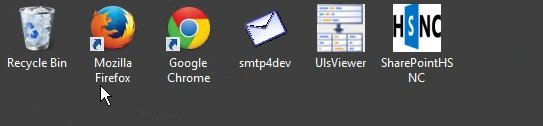
Summary
In this part of the tutorial, we installed Visual Studio 2012, Office Developer Tools for Visual Studio 2012, Google Chrome, FireFox, SharePoint Designer, NotePad++, as well as SMTP4Dev, ULSViewer and the SharePoint Host named Site Collection creator! To do that, we used a bunch of commands… now let’s group them into usable scripts!
Our First Script is to install Visual Studio 2012!
#Name: installvs2012.ps1
#Purpose: Installs Visual Studio 2012
cd C:\SharePoint\Software\VisualStudio2012
.\vs_ultimate.exe /full /noweb /quiet /p ProductKey=" XXXX-XXXX-XXXX-XXXX " /ForceRestart
The Second one is to install the Microsoft Office Developer Tools for Visual Studio 2012
#Name: installofficetools.ps1
#Purpose: Installs Microsoft Office Developer Tools for Visual Studio 2012
C:\SharePoint\Software\OfficeToolsForVS2012RTW\WebPlatformInstaller_amd64_en-US.msi /q
Start-Sleep -s 120
C:\SharePoint\Software\OfficeToolsForVS2012RTW\bin\WebpiCmd.exe /install /products:OfficeToolsForVS2012RTW /XML:C:\SharePoint\Software\OfficeToolsForVS2012RTW\feeds\latest\webproductlist.xml /AcceptEula
The third and final one is to install all the other optional software!
#Name: installoptionalsoftware.ps1
#Purpose: Installs Notepad++, Chrome, FireFox, Designer, SMTP4DEV, ULSViewer & HNSC Creator
Write-Host "Installing NotePad++"
cd C:\SharePoint\Software\NotePad++
.\npp.6.5.Installer.exe /S
Start-Sleep -s 120
Write-Host "Installing Goolge Chrome"
Cd C:\SharePoint\Software\Chrome
Msiexec /q /I GoogleChromeStandaloneEnterprise.msi
Start-Sleep -s 120
Write-Host "Installing FireFox"
cd C:\SharePoint\Software\FireFox
.\ffsetup.exe -ms
Start-Sleep -s 120
Write-Host "Installing SharePoint Designer 2013"
cd C:\SharePoint\Software\SPDesigner
.\setup.exe /adminfile updates\adminfile.msp
Start-Sleep -s 200
Write-Host "Copying standalone programs"
Copy-Item C:\SharePoint\Software\StandAlone\* C:\Users\sp_admin\Desktop
Write-Host "DONE"
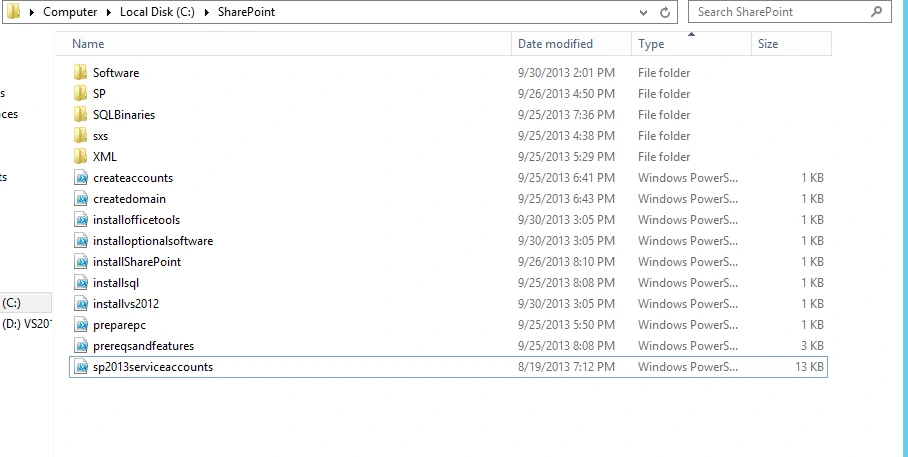
We have now installed all the software needed to Develop for SharePoint 2013. Here is how your SharePoint folder should look like: