
Create a scripted SharePoint 2013 Development Environment Tutorial – Part 2
 By Vlad Catrinescu Microsoft MVP and MCT · Pluralsight Author
Introduction
Creating a SharePoint Development Virtual Machine is something you might have to do quite a few times as a Developer. Even if it’s a pretty easy process, on a slow machine it can easily kill 4-5 hours of your day only to install SQL, SharePoint, Visual Studio and all the others tools you might need to get started. What if you could just script it so it’s all done automatically while you go take coffee, chat on SharePoint Community (opens in a new tab) or whatever else you enjoy doing? In this tutorial we will learn how to build a script that we will keep using for as long as you keep developing on SharePoint 2013. The tutorial will be split in a few sections since in order to keep them focused and short, and at the end they will all be published in a downloadable PDF. I strongly encourage you to not only copy the scripts, but actually read the blog posts of why I did them like this and there are some parts where you will need to work as well!
Sections:
- Introduction & Prerequisites & Creating the Domain and Service Accounts
- Installing software prerequisites + SQL
- Installing SharePoint 2013
- Installing Visual Studio 2012 and Optional Software
- Basic Optimizing and Summary
- Advanced Optimizing of the scripts! (You are here)
- An eBook Guide of the 6 sections and a video! (19/11/2013)
Installing software prerequisites
We will do everything under the assumption that even if this virtual machine is installed with an internet connection, we would be able to install all the next ones completely offline. First thing that we need is the sxs folder from a Windows Server 2012 ISO File. We will need it to install .Net Framework 3.5
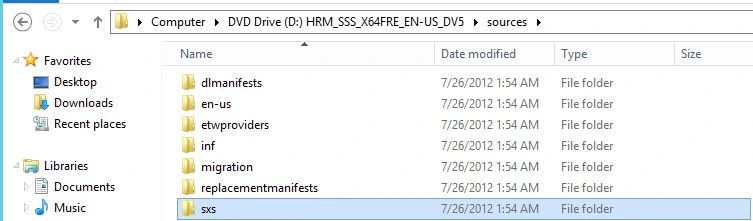
Copy the whole sxs folder to C:\SharePoint.
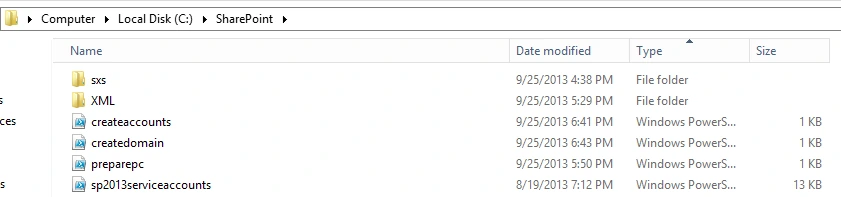
Now, run PowerShell as an Administrator and run the following command to install .Net Framework 3.5
Import-Module ServerManager
DISM.exe /Online /Enable-Feature /FeatureName:NetFx3 /All /LimitAccess /Source:"C:\SharePoint\sxs"
Next, you will probably connect to this Virtual machine with Remote Desktop, so let’s enable it!
(Get-WmiObject -Class "Win32_TerminalServiceSetting" -Namespace root\cimv2\terminalservices).SetAllowTsConnections(1)
(Get-WmiObject -class "Win32_TSGeneralSetting" -Namespace root\cimv2\terminalservices -Filter "TerminalName='RDP-tcp'").SetUserAuthenticationRequired(0)
For Remote Desktop and SQL to work properly without too much hassle, we will also disable the firewall!
netsh advfirewall set allprofiles state offNext, let’s disable IE Enhanced Security…. As it’s really annoying.
Set-ItemProperty -Path "HKLM:\SOFTWARE\Microsoft\Active Setup\Installed Components\{A509B1A7-37EF-4b3f-8CFC-4F3A74704073}" -Name isinstalled -Value 0
Set-ItemProperty -Path "HKLM:\SOFTWARE\Microsoft\Active Setup\Installed Components\{A509B1A8-37EF-4b3f-8CFC-4F3A74704073}" -Name isinstalled -Value 0
Rundll32 iesetup.dll, IEHardenLMSettings,1,True
Rundll32 iesetup.dll, IEHardenUser,1,True
Rundll32 iesetup.dll, IEHardenAdmin,1,True
If (Test-Path "HKCU:\SOFTWARE\Microsoft\Active Setup\Installed Components\{A509B1A7-37EF-4b3f-8CFC-4F3A74704073}")
{
Remove-Item -Path "HKCU:\SOFTWARE\Microsoft\Active Setup\Installed Components\{A509B1A7-37EF-4b3f-8CFC-4F3A74704073}"
}
If (Test-Path "HKCU:\SOFTWARE\Microsoft\Active Setup\Installed Components\{A509B1A8-37EF-4b3f-8CFC-4F3A74704073}")
{
Remove-Item -Path "HKCU:\SOFTWARE\Microsoft\Active Setup\Installed Components\{A509B1A8-37EF-4b3f-8CFC-4F3A74704073}"
}
Remove-ItemProperty "HKCU:\SOFTWARE\Microsoft\Internet Explorer\Main" "First Home Page" -ErrorAction SilentlyContinue
Before the next reboot is required, we will add the SQL_Admin and SP_Admin accounts to the local administrator group… make sure you change the domain info!
$pcname = hostname
Set-ADGroup -Add:@{'Member'="CN=Sp_Admin,OU=SP Service Accounts,DC=vladdev,DC=local", "CN=Sql_Admin,OU=SQL Service Accounts,DC=vladdev,DC=local"} -Identity:"CN=Domain Admins,CN=Users,DC=vladdev,DC=local" -Server:"$pcname.vladdev.local"
We might want to install / test some client software in the future, so let’s add the Desktop Experience Feature!
Add-WindowsFeature Desktop-Experience
Restart-Computer
After the computer restarts, we will log in with the SQL_Admin account!
Installing SQL Server 2012
Everything until now was pretty straightforward and easy, especially since I gave you most of the scripts. However, installing SQL Server 2012 is not as easy and it will require some input from you! To Begin with, insert the SQL 2012 ISO (with SP1 Preferably) in the virtual machine, and let’s create a folder in C:\SharePoint called “SQLBinaries” and copy all the SQL Binaries inside it!
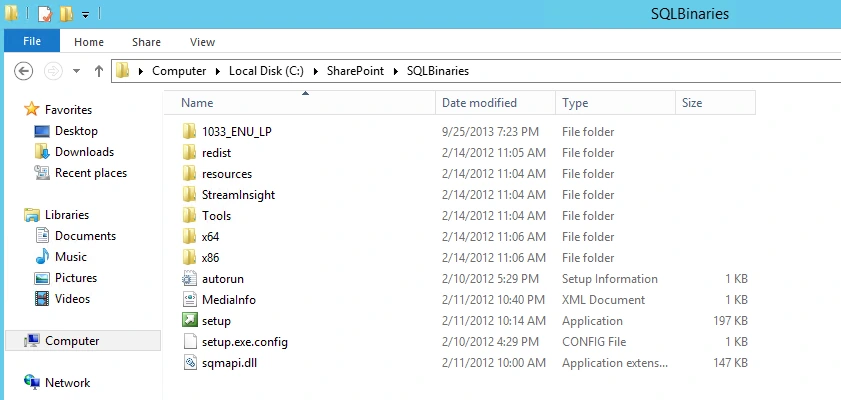
We won’t open Powershell right away… instead of me giving you all the script and configuration file which risks not working on your computer, I will show you step by step how to do it yourself! First, start setup.exe! Go in the Installation Tab and click on New SQL Server Instance. I won’t include every Screenshot, only those where you need to modify something.
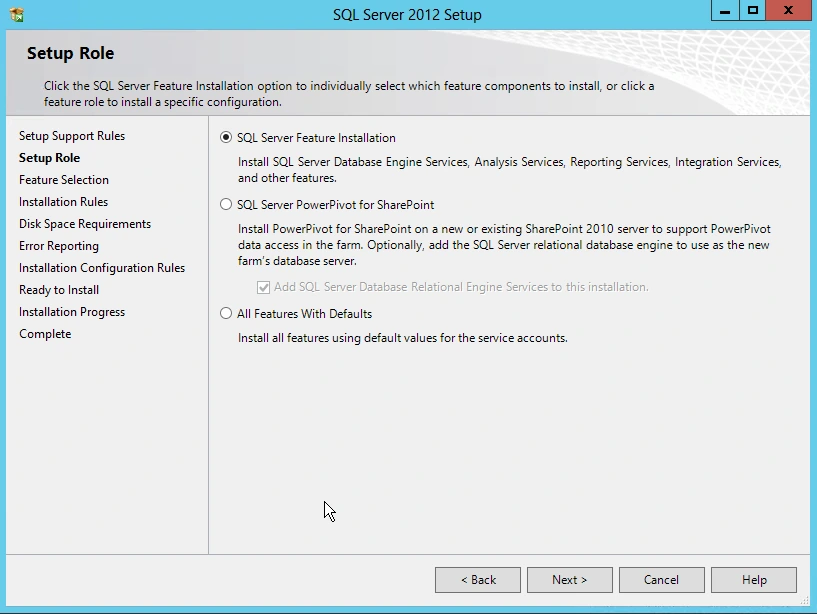
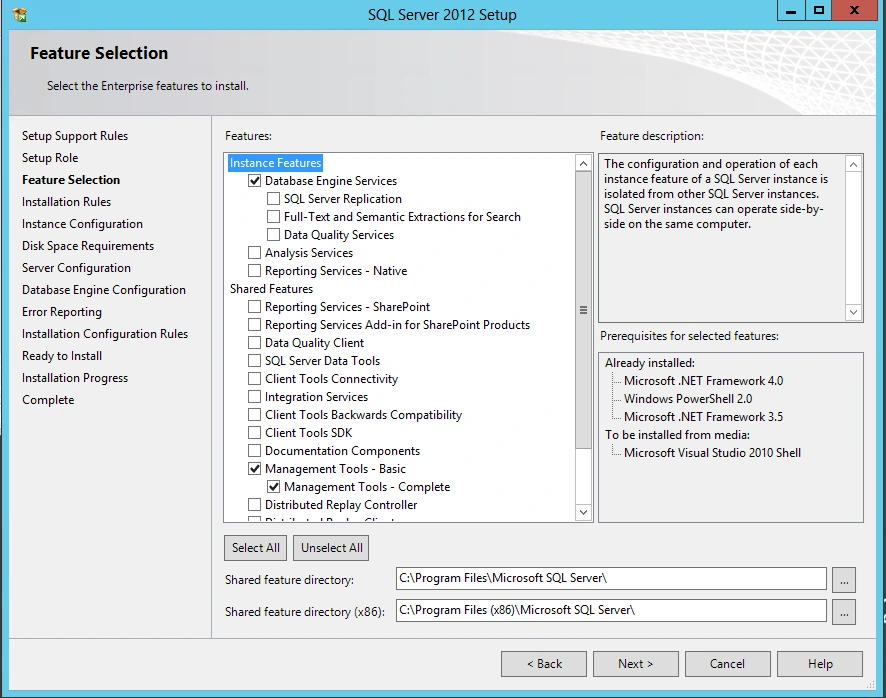
The Minimum you need for the following screen is “Database Engine” and “Management Tools – Complete”
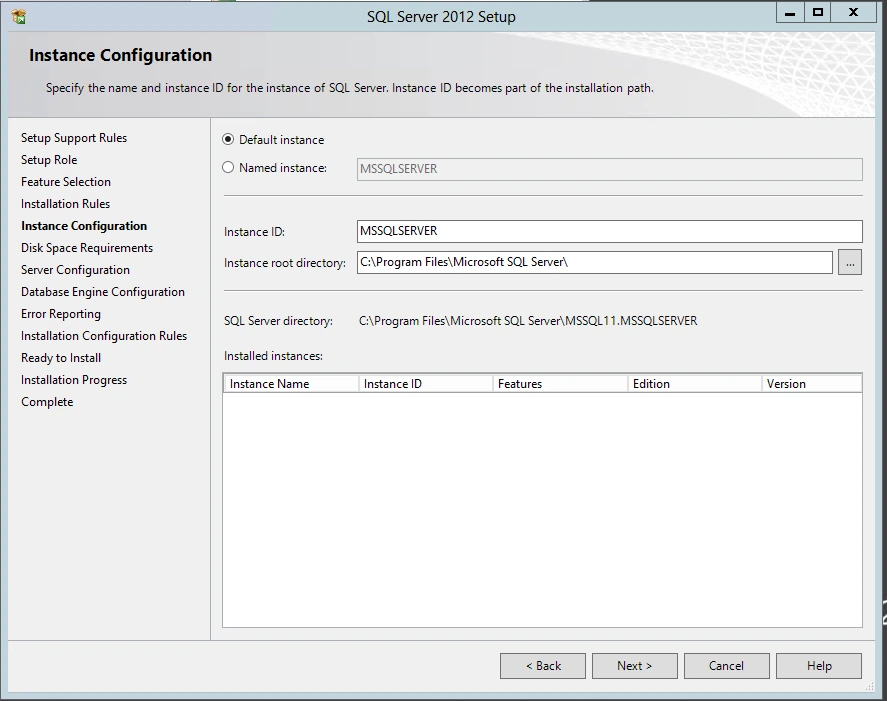
Do not Enter an Instance Name… It’s a Dev Environment!
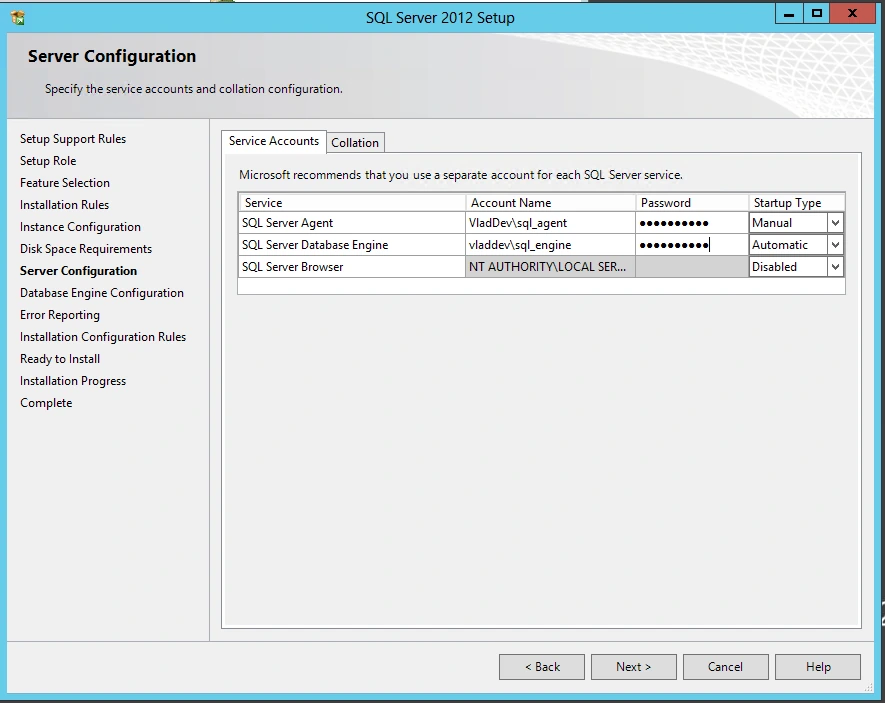
Enter the Service Accounts we created in the earlier step and their good passwords!
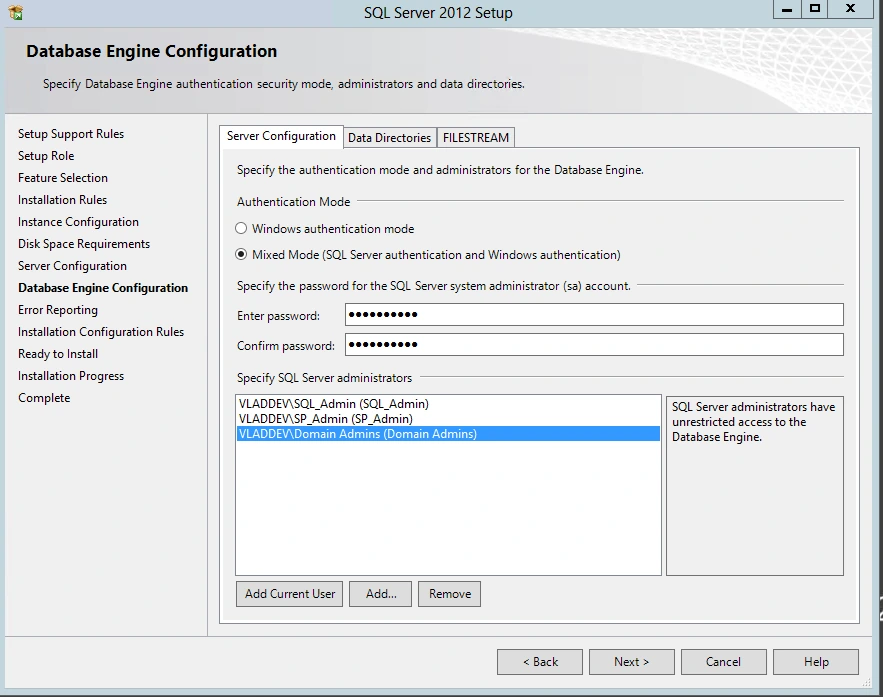
Configure SQL in Mixed Mode and add SQL_Admin, SP_Admin and the “Domain Admins” group to the SQL Server Administrators.
And now we stop at this step! Do not click install!
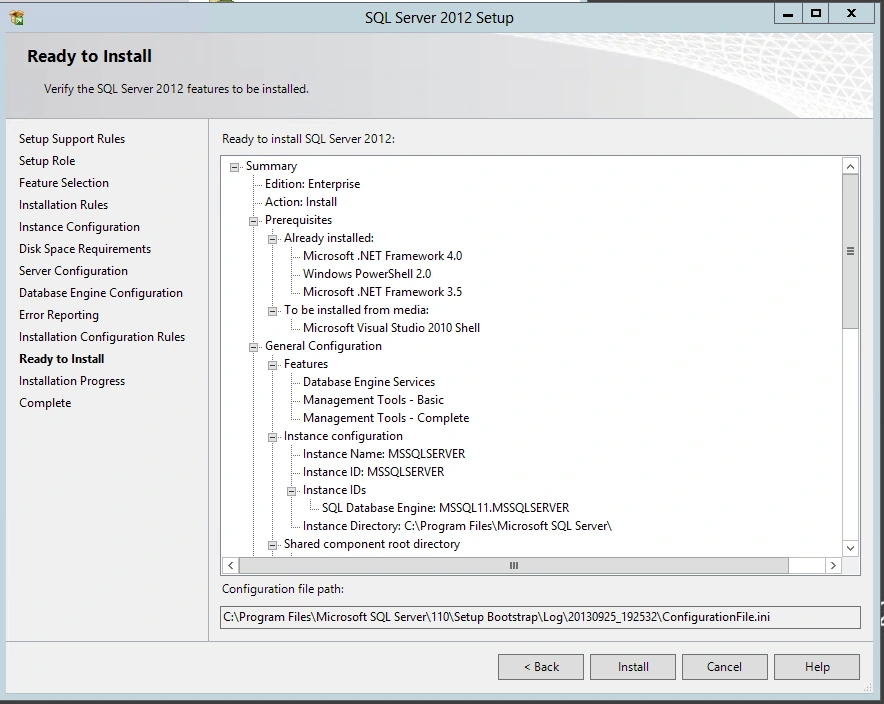
You can see that on the bottom, we have a “Configuration File Path”. That’s the Configuration File we need, so go at the path there and copy the “ConfigurationFile.ini” file in C:\SharePoint\SQLBinaries . You can now cancel the Installation Wizard!
Now that we have everything configured in there, let’s see how we do it with PowerShell for the next times! Just fill the info for the following script!
cd c:\SharePoint
.\SQLBinaries\Setup.exe /ConfigurationFile=.\SQLBinaries\ConfigurationFile.INI /Q /Action=Install /IAcceptSQLServerLicenseTerms /SQLSVCPASSWORD=pass@word1 /AGTSVCPASSWORD=pass@word1 /sapwd=pass@word1
If you go in the Start Menu, you should now have a bunch of SQL tools. You can open the Management Studio if you want to start checking your SQL Configuration.
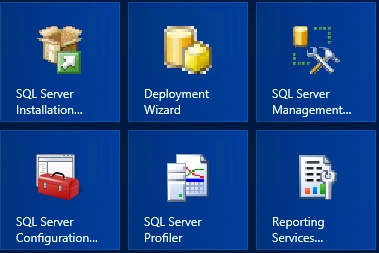
SQL is now setup!
Summary
In Part 2 of this tutorial, we enabled and disabled a bunch of Windows Features in order to make it easy for us to develop afterwards and to make sure everything installs smoothly. Furthermore we created the SQL Configuration file we will use in the future as well as install SQL. We only have two scripts we will use for future installations:
Script 1 that Enables all the features and installs .Net Framework 3.5
#Name: prereqsandfeatures.ps1
#Purpose: Installs Prerequisite Software and Features
#Disable Firewall
netsh advfirewall set allprofiles state off
#Disable IE Enhanced Security
Write-Host -ForegroundColor White " - Disabling IE Enhanced Security..."
Set-ItemProperty -Path "HKLM:\SOFTWARE\Microsoft\Active Setup\Installed Components\{A509B1A7-37EF-4b3f-8CFC-4F3A74704073}" -Name isinstalled -Value 0
Set-ItemProperty -Path "HKLM:\SOFTWARE\Microsoft\Active Setup\Installed Components\{A509B1A8-37EF-4b3f-8CFC-4F3A74704073}" -Name isinstalled -Value 0
Rundll32 iesetup.dll, IEHardenLMSettings,1,True
Rundll32 iesetup.dll, IEHardenUser,1,True
Rundll32 iesetup.dll, IEHardenAdmin,1,True
If (Test-Path "HKCU:\SOFTWARE\Microsoft\Active Setup\Installed Components\{A509B1A7-37EF-4b3f-8CFC-4F3A74704073}")
{
Remove-Item -Path "HKCU:\SOFTWARE\Microsoft\Active Setup\Installed Components\{A509B1A7-37EF-4b3f-8CFC-4F3A74704073}"
}
If (Test-Path "HKCU:\SOFTWARE\Microsoft\Active Setup\Installed Components\{A509B1A8-37EF-4b3f-8CFC-4F3A74704073}")
{
Remove-Item -Path "HKCU:\SOFTWARE\Microsoft\Active Setup\Installed Components\{A509B1A8-37EF-4b3f-8CFC-4F3A74704073}"
}
Remove-ItemProperty "HKCU:\SOFTWARE\Microsoft\Internet Explorer\Main" "First Home Page" -ErrorAction SilentlyContinue
#Enable Remote Desktop
(Get-WmiObject -Class "Win32_TerminalServiceSetting" -Namespace root\cimv2\terminalservices).SetAllowTsConnections(1)
(Get-WmiObject -class "Win32_TSGeneralSetting" -Namespace root\cimv2\terminalservices -Filter "TerminalName='RDP-tcp'").SetUserAuthenticationRequired(0)
#Add .Net FrameWork
Import-Module ServerManager
DISM.exe /Online /Enable-Feature /FeatureName:NetFx3 /All /LimitAccess /Source:"C:\SharePoint\sxs"
#add SPAdmin and SQL Admin to Local(Domain) Administrators
$pcname = hostname
Set-ADGroup -Add:@{'Member'="CN=Sp_Admin,OU=SP Service Accounts,DC=vladdev,DC=local", "CN=Sql_Admin,OU=SQL Service Accounts,DC=vladdev,DC=local"} -Identity:"CN=Domain Admins,CN=Users,DC=vladdev,DC=local" -Server:"$pcname.vladdev.local"
#Enable Desktop Experience
Add-WindowsFeature Desktop-Experience
Restart-Computer
Script #2 which installs SQL!
#Name: installsql.ps1
#Purpose: Installs SQL
cd c:\SharePoint
.\SQLBinaries\Setup.exe /ConfigurationFile=.\SQLBinaries\ConfigurationFile.INI /Q /Action=Install /IAcceptSQLServerLicenseTerms /SQLSVCPASSWORD=pass@word1 /AGTSVCPASSWORD=pass@word1 /sapwd=pass@word1
shutdown -l
We can now log on with SP_Admin and head over to Part 3: Installing SharePoint 2013

