
Configure DLP in SharePoint 2016 Step by Step Tutorial
 By Vlad Catrinescu Microsoft MVP and MCT · Pluralsight Author
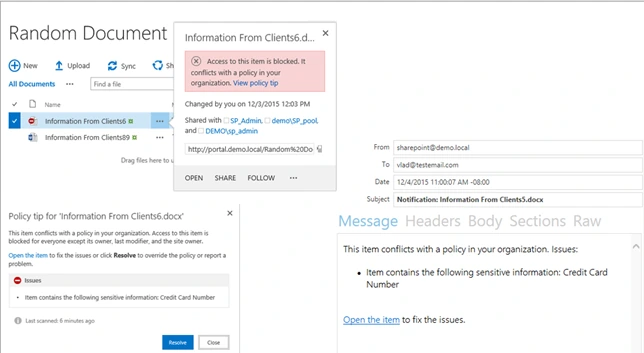
As part of the release of SharePoint 2016, and included since Beta 2, Microsoft included Data Loss Prevention (DLP) Capabilities in SharePoint Server. DLP, not to be confused with DPM (Data Protection Manager), is a way to make sure that your employees do not put sensitive information such as Social Security Numbers, Credit Cards, Passport Numbers or more in sites where they shouldn’t. When users upload documents they shouldn’t, the item can be blocked from viewing, and the user and selected administrator will receive an email notification. To give you a glimpse of the final result, here are some screenshots:
Pre-Requirements
Before getting DLP to work, there are some pre-requisites, but don’t worry they aren’t big.
- Configure the Search Service Application
- Crawl the location of the conflicting documents
- Configure Outgoing e-mail
- Your Users need to have an e-mail address in their profile.
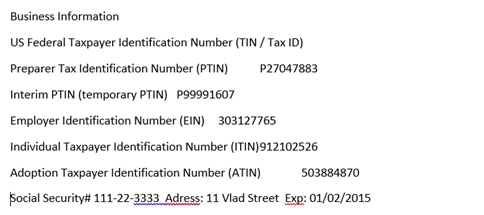
For this example, I will put those two files in SharePoint. File one contains A Social Security Number as well as Tax Information.
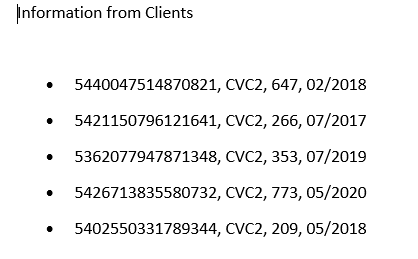
File two is a list of credit cards from my consumers.
You can download both files on my OneDrive here. (opens in a new tab) Make sure to upload all your files in SharePoint, and start a crawl. To make sure they are searchable, do a search for them in a standard SharePoint Search box.
If those four pre-requisites do not work properly, your DLP will not work!
2. Configure DLP in SharePoint 2016
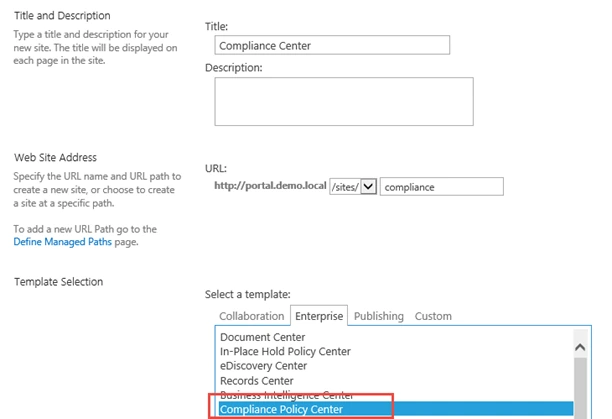
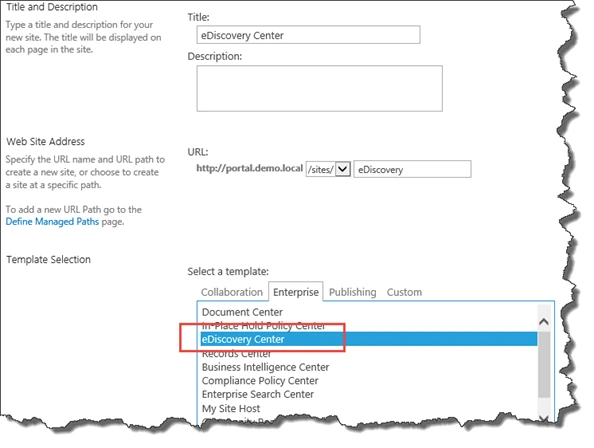
After your pre-requisites are done, the first thing we need to do is create two site collections. The first one is the Compliance Policy Center. Simply create a new Site Collection and give it that template, which is under the Enterprise Tab.
The second one we have to create is an eDiscovery Center. This template is also under the Enterprise tab.
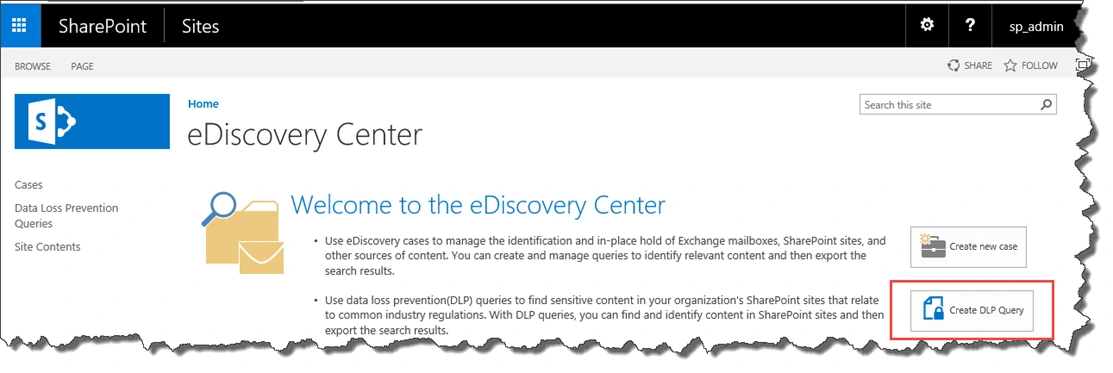
Now that our two Site Collections are created, let’s go to the eDiscovery Center to see if the SharePoint system can correctly identify our documents. So Navigate to the eDiscovery Center and click on Create DLP Query
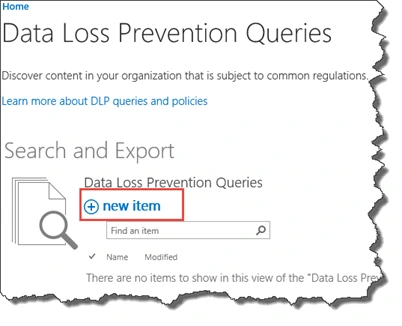
Afterwards, once you’re on the Data Loss Prevention Queries page, click on “New Item”
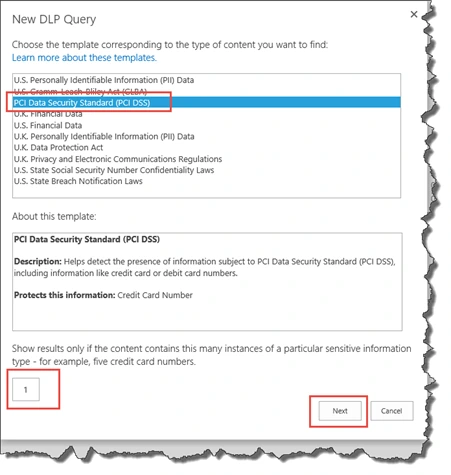
A popup window will show to ask us what kind of DLP Query we want to test. For this example, I will select PCI Data Security Standard. If you look at the description, this will find Credit Card Numbers, and since one of my demo files had a credit inside, it should work.
NOTE: If you don’t have a file with credit cards, this won’t work. If you only have Social Security Numbers, choose US Personally Identifiable Information.
Afterwards, we have the option to show results, only if a certain “violation” is committed a certain number of times. Since we only want to test our system, we will put “1” in that box. Afterwards click on “Next“.
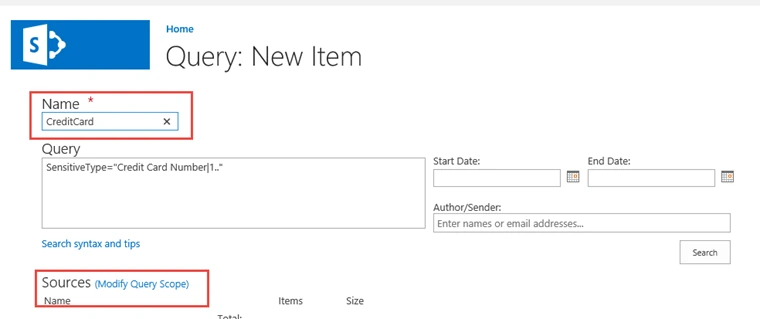
After we click next, a New “Query Item” window will open, and the Query will already be pre-created for us. First thing we have to do is Give it a Name, and afterwards click on Modify Query Scope.
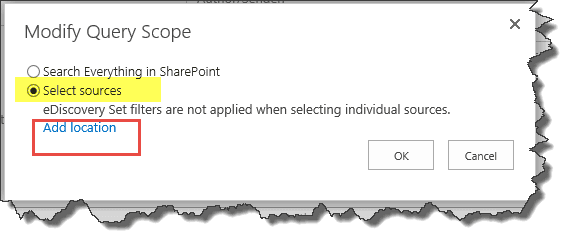
Select the “Select Sources” checkbox, and afterwards “Add Location”
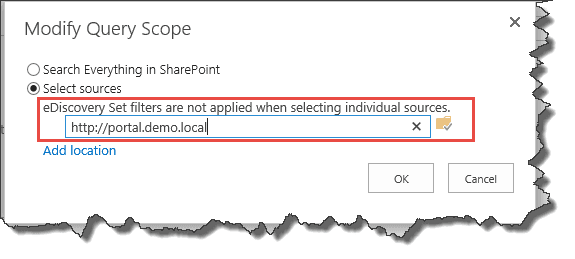
Add the Site Collection on which you uploaded your documents earlier. In my case it was https://portal.demo.local (opens in a new tab) . Afterwards click on OK.
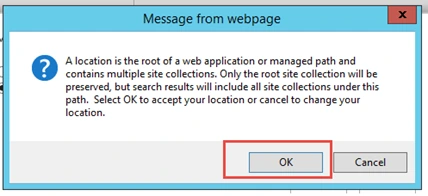
If you put the Root Site Collection, you will get the warning that the search will happen in all the Web Application which works for us! Simply Click OK!
After that is done, Click the Search Button, and you should have at least one result, the file we just uploaded that contains Credit Card Information.
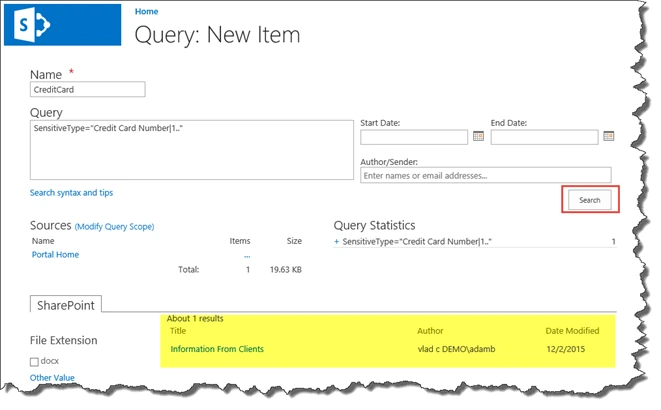
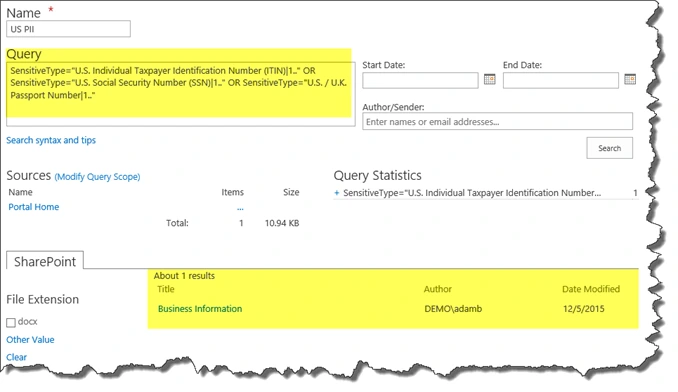
If you uploaded multiple documents and want to test them all, make another DLP Query on that item. In my case, I also had another document with a Social Security Number, so I created a new DLP Query looking for US Personally Identifiable Information. As you can see, the eDiscovery center was able to find my document.
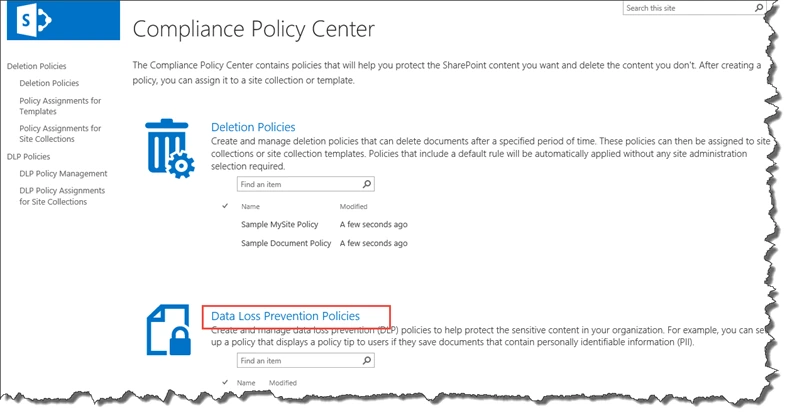
If it all works for you until now, it means that your Search is configured correctly, and SharePoint can find your documents, however you don’t have a policy yet. Now, we need to navigate to the Compliance Policy Center site we created previously. On the site, click on “Data Loss Prevention Policies”
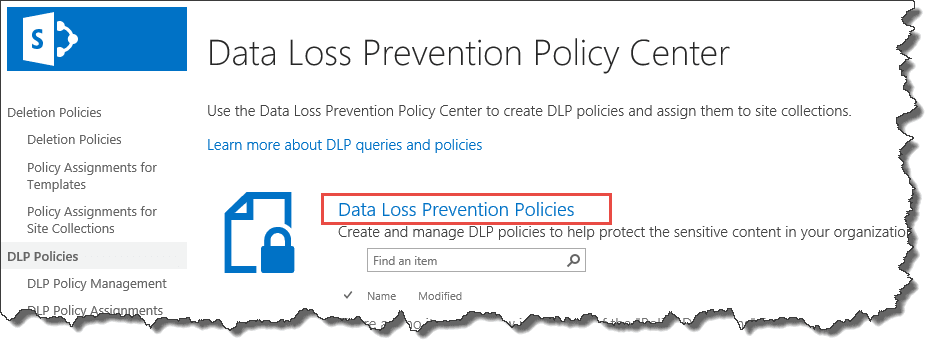
Afterwards, click on “Data Loss Prevention Policies” again.
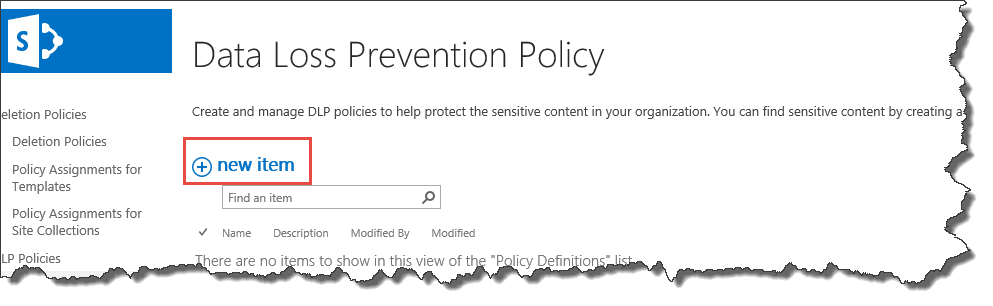
We are then going to click on “New Item”
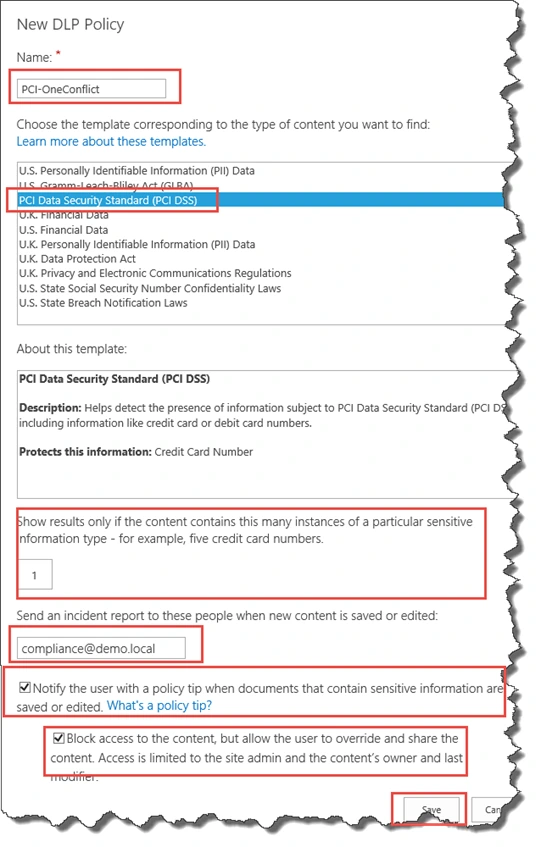
Then we will have a very similar screen as in the eDiscovery Center, except a few differences. First thing first, enter the Name of your policy and select the type. I selected PCI Data Security Standard in order to find documents with credit cards. Afterwards, select how many conflicts there must be for this rule to take effect, I selected one. Until now the screen is pretty similar to eDiscovery, but that’s where it changes.
Enter an email address where a notification must be sent when there is a document in violation. In my case, I want to notify my compliance department, so I entered compliance@demo.local . We then have the choice, to enable or not the Policy Tip. The Policy tip is what you saw in the first screenshot where, directly in SharePoint, the user is notified via a red popup that his document is violating certain rules. The other choice is do we want to block that document? As soon as the document is found, we can limit the access to Site Admins and the owner/editor of the document. No one else can then see the document. In my case, I selected both checkboxes and clicked save.
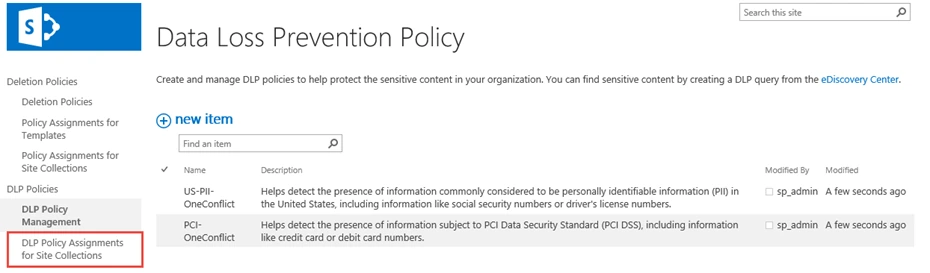
Afterwards, I created a very similar one but about US Personally Identifiable Information. I won’t include a screenshot of it. After your Policies are created, we need to assign them to Site Collections. So Click on “DLP Policy Assignments for Site Collections”
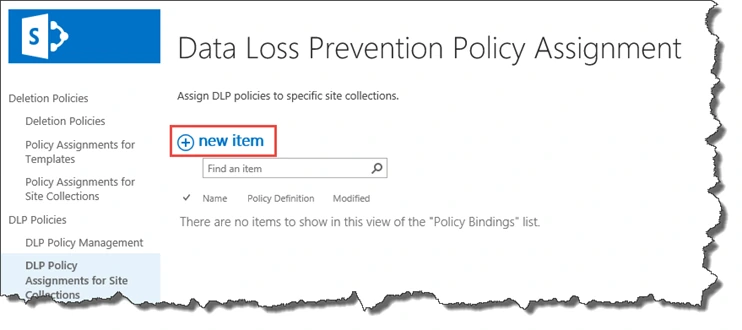
In that list, click on “New Item”
As the form says, click on “First choose a site collection”
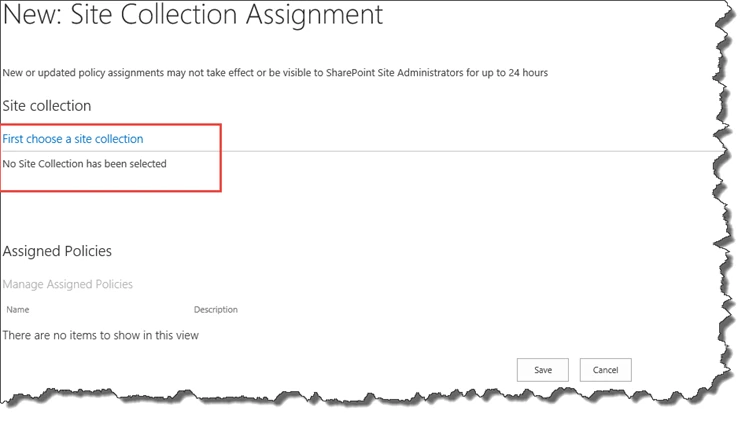
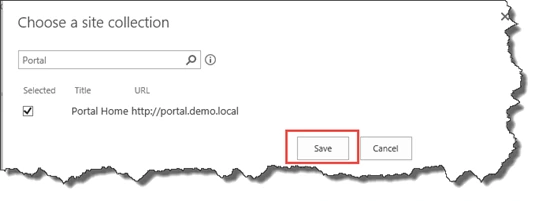
Enter the Title or the URL of the Site Collection you want to assign it to, then select the checkbox next to it and click “Save”
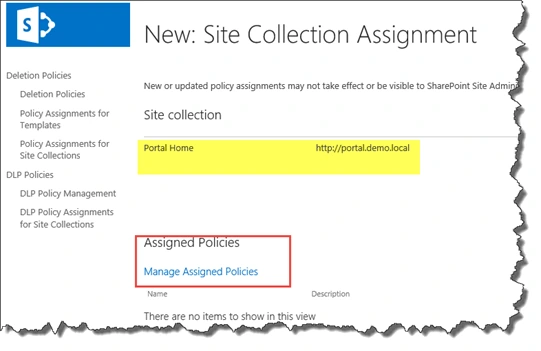
You will notice that the Site Collection got added at the top. Now click on “Manage Assigned Policies”
Select the Policy you want to apply, and then click Save.
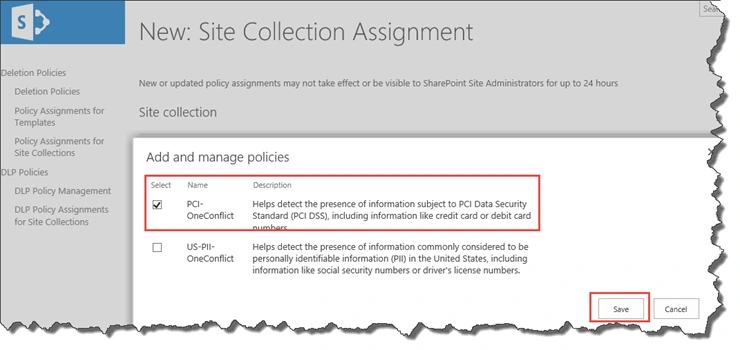
NOTE: In SharePoint 2016 Beta 2, it’s a 1 to 1 mapping between SC and Policies. Meaning you cannot add multiple Site Collections in the same Assignment, and you cannot select multiple Policies in the same assignment. To apply two policies to the same Site Collection, create a new Site collection assignment! It might, or might not change in RTM.
You will notice the Policy got assigned to the Site Collection now click Save.
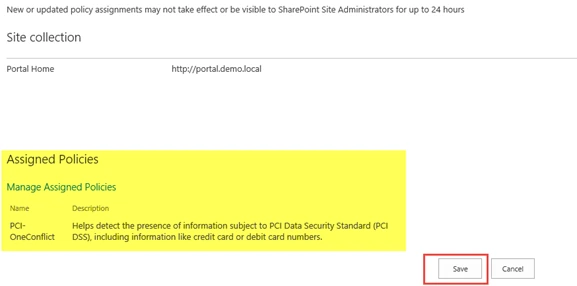
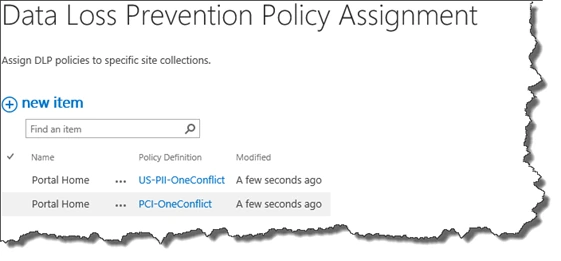
Since I wanted to also apply the SSN policy to my Site Collection, I created a new Policy Assignment and my list now looks like this:
Now What? Well, it doesn’t happen right away! If you noticed at the top of the “New Policy Assignment” page, there was an information stating that, it might take up to 24 hours before you see the results. That is because, depending on the importance of your policy, it might take up to 24h to run! However, if you created “High Priority” rules like we just did (SSN, Credit Card), the timer job runs every 15 minutes.

The results
Emails
So, we wait a bit, and then, we will start receiving emails! Let’s look at the emails first:
_NOTE:_There is a bug in SharePoint 2016 Beta 2, where the email that should go to the user with subject “Notification: DocumentName.docx” goes to the email you defined in the Policy instead. Microsoft is aware of this bug and will be fixed by RTM.
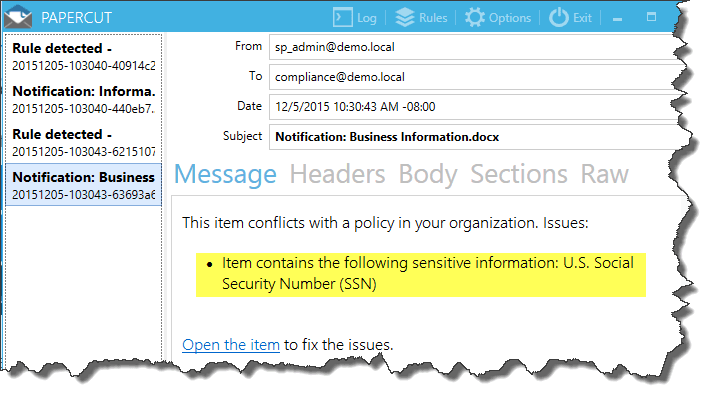
So let’s look at our notification, only for the SSN, the Credit Card one will be the same but different small details.
- The User notification for the SSN error. (In Beta 2 it was sent to Compliance@demo.local, but it was supposed to be sent to adamb@demo.local, since he uploaded the document)
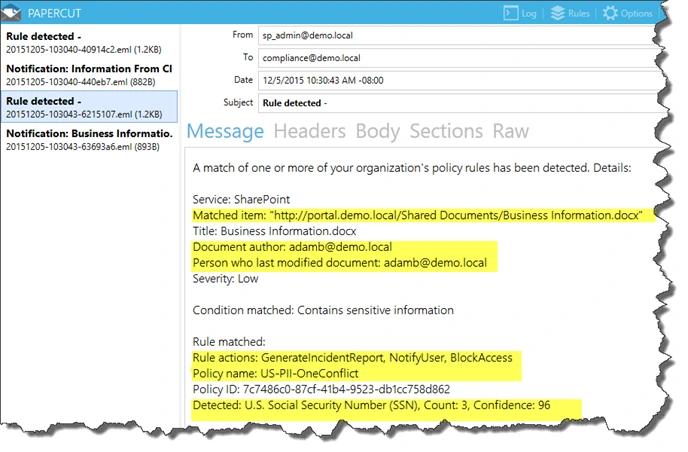
- The Administrator notification for the SSN Error. As you can see there is a lot of useful information and I highlighted some of it!
The Policy Tips
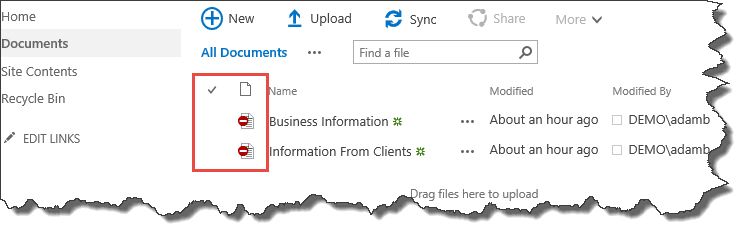
Now that we see the Email Notifications, let’s look at the Policy Tips which personally, I find pretty cool! First thing that you will see is that The documents now have a “Stop” sign on them, showing something is wrong.
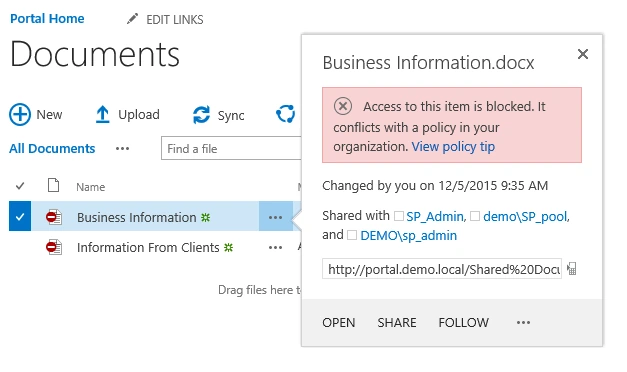
The document information panes tells us that the access to the document is blocked because it conflicts with a policy in your organization. If a user sees this prompt, it means he has access to the document. When the document is blocked, users who can’t access it don’t even see it in the document library. Afterwards click on “View Policy Tip”
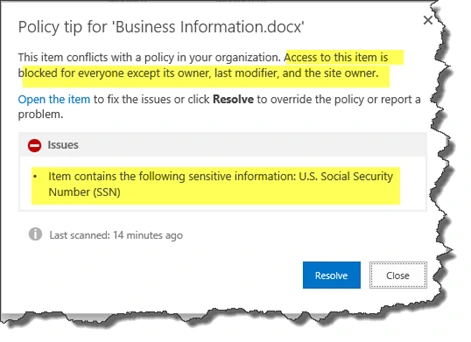
The Policy Tip shows us what is wrong with the item, as well as who has access to it now. As a User you have two choices, you either go in the document, edit the bad part or if you think it’s an error, you must click on Resolve.
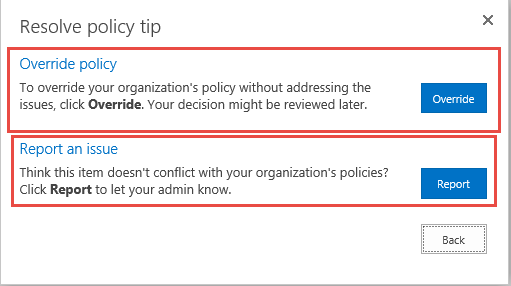
When you click on Resolve, You can either ask to Override the Policy, which means that you are aware, and its normal the data is in the document. The other choice Reporting, which means that you think the document is fine and shouldn’t trigger the policy.
When you click Override, you are encouraged to provide a business justification. So I made up a justification and clicked Submit.
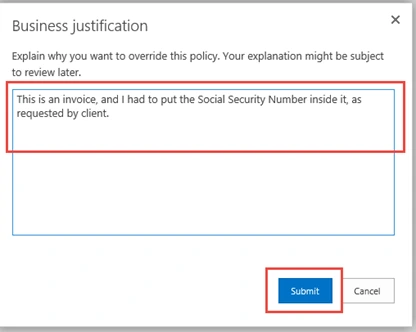
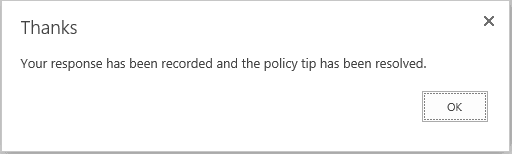
I got the information that My response has been recorded, and that the Policy Tip has been resolved.
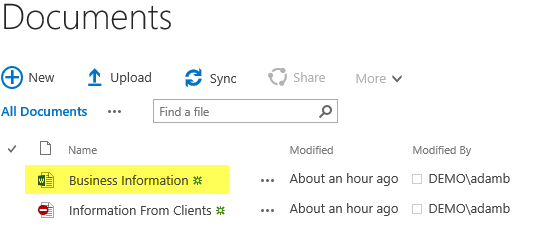
The document is also not blocked anymore.
Now let’s see what happens when we click “Report”. We simply Click Report, and then we get the same “Thanks Message”
Note: In SharePoint 2016 Beta 2, I didn’t receive any notification information as the policy creator that someone said it was ok.
That is about it for configuring SharePoint 2016 DLP. This post was written for SharePoint 2016 Beta 2, but I will update as needed when RTM comes out. If you have any questions or opinions, ask in the comments!

