Administering Information Security in Microsoft 365
Free study notes for every skill the exam measures, plus the books, courses and practice tests I recommend.
By Vlad CatrinescuMicrosoft MVP and MCT · Pluralsight Author
The SC-401 Study Guide helps you prepare for the SC-401: Administering Information Security in Microsoft 365 exam, which leads to the Microsoft Certified: Information Security Administrator Associate certification. It is built for administrators who protect sensitive data across Microsoft 365 with Microsoft Purview: information protection, data loss prevention, retention, insider risk, and the controls that keep data safe when AI services use it.
Everything here lines up with the skills Microsoft measures: free Microsoft Learn paths and my own study notes for self-study, plus the books, courses and practice tests I recommend when you want more. No exam dumps, ever.
Exam length
100 min
Passing score
700 / 1000
Skills measured
3 domains, 65 skills
Guide reviewed
September 2026
Resources by the way you like to study
9 hand-picked, free and paid
Books
1 resource
Many learners prefer studying from books, which is why Microsoft continues to publish the Exam Ref series. Just keep in mind that books can lag behind exam updates, so always check the publication date and whether the skills measured changed since.
As of today there is no book dedicated to the SC-401 exam, so I have left the certification guide for the exam it replaced, the SC-400. Much of that content still applies.
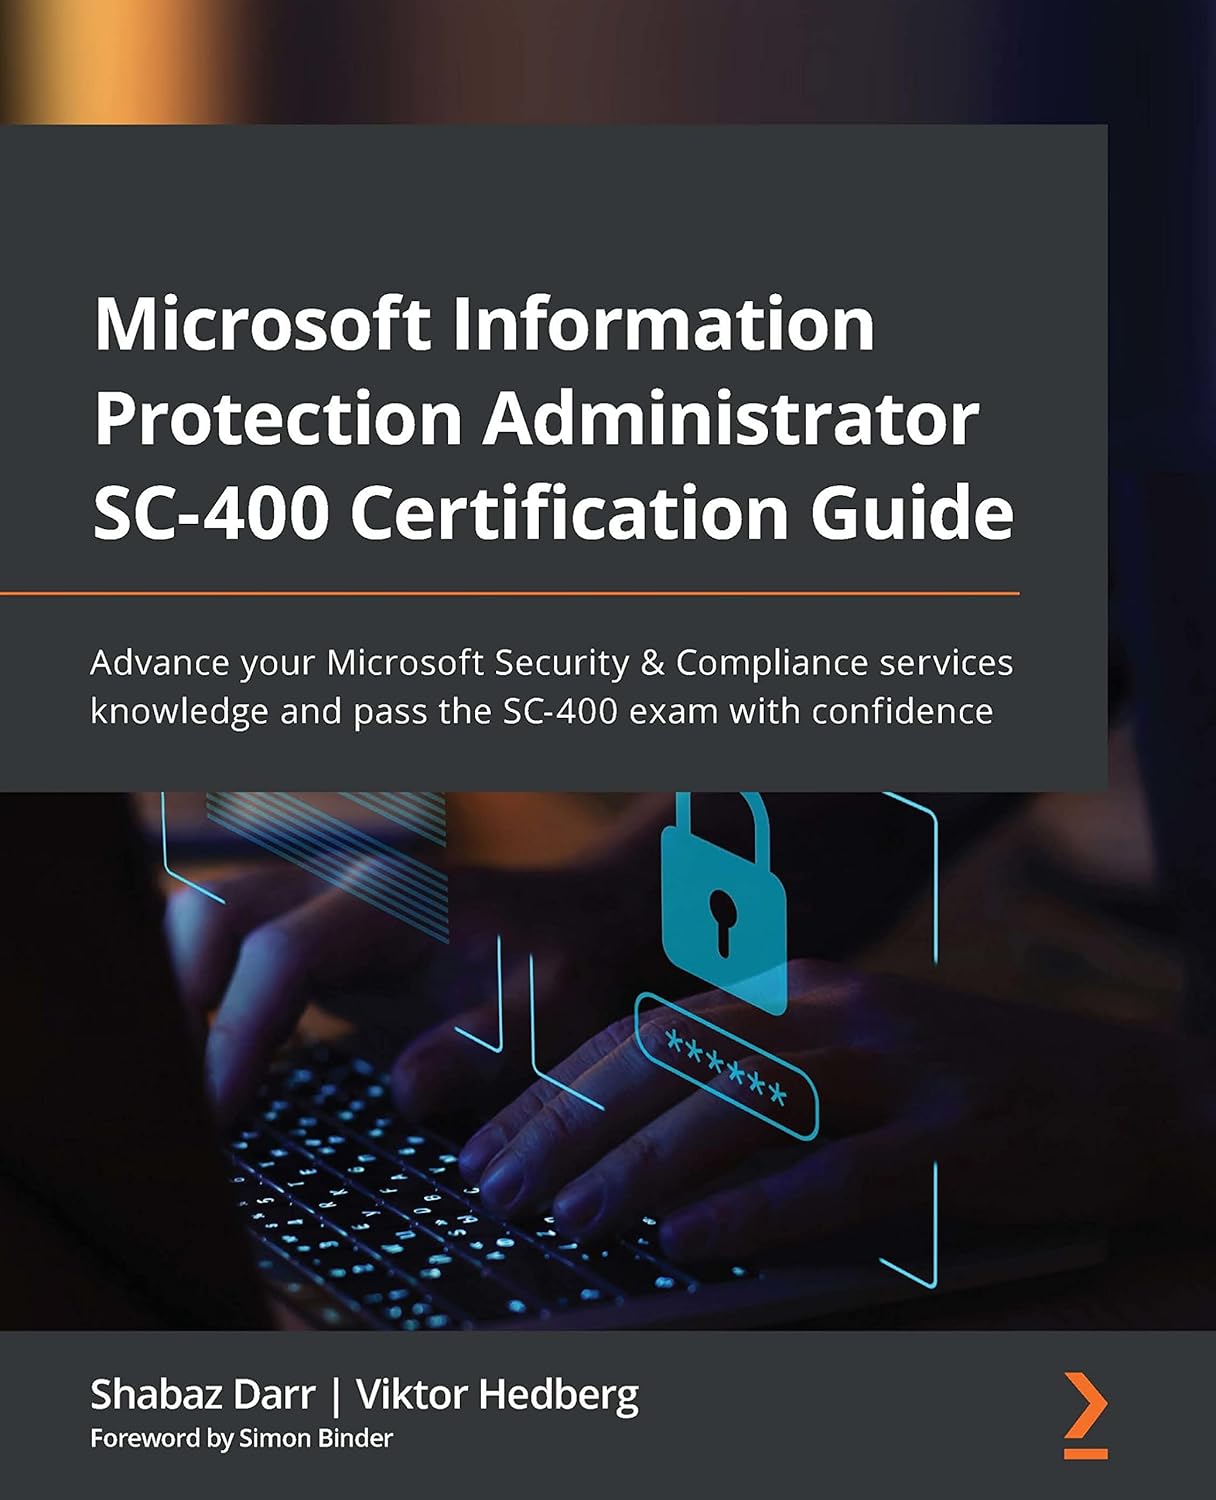
Microsoft Information Protection Administrator SC-400 Certification Guide: Advance your Microsoft Security & Compliance services knowledge and pass the SC-400 exam with confidence
The SC-400 was the exam SC-401 replaced, and there is no SC-401 book yet. Its coverage of information protection, data loss prevention, and retention still maps closely to today's skills measured, so it works as a study companion and desk reference until a dedicated SC-401 title arrives.
On-demand training lets you learn at your own pace, on your own schedule. Whether it's expert-led video courses from platforms like Pluralsight or Udemy, or hands-on modules from Microsoft Learn, you get flexible access to practical, real-world learning when you need it most.
Not all training platforms are the same. Some, like Pluralsight, rely on vetted authors and curated content, while others function as open marketplaces where quality can vary. I only recommend courses that are highly rated and closely aligned with the skills you need, and I still encourage reviewing course details and feedback before enrolling.
Recommended
Microsoft Information Protection and Compliance Administrator (SC-400) Certification Path
Practice test includedFree trial
My top pick to start. This certification path covers classifying and protecting sensitive data, data loss prevention, retention, and insider risk with Microsoft Purview, the core of what SC-401 tests. It is currently the SC-400 path, and those skills carry over to SC-401 almost one to one.
SC-401 Information Security Administrator Associate course
A full SC-401 prep course that teaches the core skills for protecting and governing data across Microsoft 365 with Microsoft Purview, with hands-on labs and simulations to follow along.
SC-401: Information Security Administrator Associate
A practical walkthrough of administering information protection and compliance in Microsoft 365 with Microsoft Purview: classifying and labeling sensitive data, configuring data loss prevention, and implementing retention and records management.
A free video series that breaks down key SC-401 topics such as identifying sensitive data, building custom sensitive info types, and document fingerprinting, with Microsoft Purview walkthroughs you can follow along with.
These are practice exams, not exam dumps. I don't support dumps, as they undermine the value of the certification for everyone. Practice tests are a great way to validate your knowledge and get exam-ready after completing the content in this study guide.
Exam SC-401: Microsoft Information Security Administrator Associate
Practice questions that mirror the SC-401 exam across information protection, data loss prevention, retention, and insider risk, with explanations so you can see why each answer is right.
SC-401: Administering Information Security in Microsoft 365
Timed SC-401 practice tests built to mirror the real exam, with verified answers and detailed explanations so you can find and close your weak spots before exam day.
Microsoft Learn is a great free way to learn about the SC-401 exam content! It contains mostly text-based articles, while also providing you small quizzes at the end of every module.
The course syllabus below is Microsoft's own list of the learning paths and modules that cover the exam. When you want one topic rather than the whole curriculum, every skill in my study notes links the exact Microsoft Learn page for it.
Course SC-401T00-A: Protect sensitive information with Microsoft Purview in the AI era
Free
Microsoft's official SC-401 course page. The syllabus lists every Microsoft Learn path and module the course teaches, and all of them are free to work through at your own pace.
Live training is delivered through Microsoft Official Courses, scheduled with Microsoft Learning Partners and taught by Microsoft Certified Trainers. This format offers real-time interaction, allowing you to ask questions and learn directly from an expert, though it is typically the most expensive training option.
Course SC-401T00-A: Protect sensitive information with Microsoft Purview in the AI era
The official instructor-led course, delivered by Microsoft Learning Partners. It covers information protection, data loss prevention, retention, insider risk, and protecting data used by AI, and is the most guided (and most expensive) way to prepare.
Some links on this page are affiliate links. If you use them, I may earn a commission at no extra cost to you.
Skills measured and study notes
65 skills, free to study here
Built for the skills measured that take effect on 28 October 2026.
0 of 65 studied
The SC-401 exam covers three domains, and this guide breaks down every skill Microsoft lists so you can study each one on purpose. For every skill you get a short explanation, the specific facts the exam likes to test, and a link to the Microsoft Learn page that goes deeper. This is the same way I prepare for Microsoft exams myself, and after years of helping IT pros get certified, I can tell you that working through the skills measured one at a time is the single most effective thing you can do.
Here is how the three domains break down by weight:
Tip: The three domains carry almost identical weight, so don't over-invest in one area. Insider Risk Management is the single largest topic inside domain three, and protecting data used by AI is the newest, so give both extra attention if you last studied for the SC-400.
Domain 1Implement Information Protection30-35% of the exam0 / 20 studied
This domain is about knowing your data and protecting it: finding sensitive information with classifiers, labeling it with sensitivity labels, and extending that protection to Windows devices, on-premises file shares, and email. Everything here runs on Microsoft Purview, and most of it lives in the Microsoft Purview portal under Information Protection.
Implement and manage data classification
01
Identify sensitive information requirements for an organization's data
Studied
Before you can protect data, you need to know what counts as sensitive in your organization. This skill is about translating business and regulatory requirements (things like credit card numbers, health records, or an internal project code) into something Purview can detect.
What you need to know
Classification is the foundation for every other protection: DLP, auto-labeling, retention, and insider risk all act on what the classifiers find
Requirements usually come from regulations (PCI, HIPAA, GDPR), contracts, and internal policy
Microsoft Purview finds sensitive data three ways: manually by users, with automated pattern matching (sensitive information types), and with machine learning (trainable classifiers)
Data is classified automatically as it is created or changed, using whatever sensitive information types are defined in the tenant
Translate sensitive information requirements into built-in or custom sensitive info types
Studied
A sensitive information type (SIT) is a pattern Purview looks for. Microsoft ships more than 200 built-in SITs, and you map your requirements to those first, only building custom ones when nothing fits.
What you need to know
A SIT is made of a primary element (a regex, keyword list, keyword dictionary, or function), supporting elements, a confidence level, and a character proximity window
Confidence level (High, Medium, Low) reflects how much supporting evidence was found near the primary element, not how "important" the data is
Built-in SITs cover common identifiers like credit cards, passport numbers, and national IDs
Named entity SITs (like "all full names" or "medical terms") are broad and are meant to be combined with other conditions, not used alone
Exam tip: Higher confidence means fewer false positives but more false negatives. Expect a scenario that asks you to raise confidence to cut noise, or lower it to catch more.
When no built-in SIT matches, such as an internal employee ID format, you build a custom one from scratch or copy and modify an existing SIT.
What you need to know
You create custom SITs in the Microsoft Purview portal under Information Protection > Classifiers > Sensitive info types
Microsoft 365 uses the Boost regex engine, so patterns follow that syntax
You can copy a built-in SIT and tune it, but some built-in SITs (several EU identity types) cannot be copied
After you create or change a custom SIT, existing content must be recrawled before it is reclassified; new and edited content is evaluated automatically
Document fingerprinting turns a standard form or template (a patent application, a government form, an employee agreement) into a SIT, so Purview can spot documents based on that template.
What you need to know
You upload a blank template, and Purview creates a fingerprint from its structure
Fingerprinting is best for fixed-layout, standardized documents
You can require an exact match, or allow partial matching so lightly edited copies are still detected
Fingerprint SITs are used in DLP policies the same way as any other SIT
Create and manage exact data match based sensitive information types (EDM)
Studied
Exact Data Match (EDM) matches against your actual data, such as a table of real customer records, so it flags a match only when the value truly belongs to your organization. This dramatically cuts false positives.
What you need to know
You define a schema, upload a sensitive information source table, and only a salted hash of the data is uploaded, so the real values never leave your control
An EDM SIT has a primary element mapped to a strongly defined base SIT, plus supporting elements that raise confidence
A schema can have up to ten fields marked as searchable, and at least one must be searchable
Map the primary element to a tight SIT (like SSN), not a loose one (like "any number"), or the classifier throttles and misses matches
Exam tip: EDM is the answer when the requirement is "only match our real customers/employees, not any number that looks like an SSN."
Trainable classifiers use machine learning to recognize a category of content by example (contracts, resumes, source code) rather than by a fixed pattern. They are for content that has no reliable regex.
What you need to know
Two kinds exist: pre-trained classifiers Microsoft provides, and custom classifiers you train with your own sample content
A custom classifier is seeded with positive sample items, then tested against more items before you publish it
Trainable classifiers work with sensitivity labels, auto-apply retention labels, DLP, and communication compliance
They can misfire on content unlike the training set, so review results and give match or not-a-match feedback to improve accuracy
Monitor data classification and label usage by using Data explorer and Content explorer
Studied
Once classification is running, you need to see what was found and what users are doing with it. That is the job of the explorers in the Microsoft Purview portal.
What you need to know
Tool
What it shows
Content explorer
Where labeled and classified items currently live, and lets you drill into a specific site or mailbox
Activity explorer
The actions taken on labeled and classified items over time, such as label changes and downloads
Content explorer access is gated by two roles: one to see counts (Content Explorer List viewer) and one to open the actual items (Content Explorer Content viewer)
Both explorers are found under Information Protection > Explorers in the Purview portal
Classification runs before you create any policy, so you can see impact first (this is the "zero change management" idea)
Configure optical character recognition (OCR) support for sensitive info types
Studied
OCR lets Purview read text inside images (screenshots, scanned documents, photos of a whiteboard) so your SITs and trainable classifiers can find sensitive data in pictures, not just documents and email.
What you need to know
OCR is optional and off by default; you turn it on at the tenant level under Settings in the Purview portal
It requires pay-as-you-go billing through Microsoft Syntex in Azure (you do not have to set up Syntex itself)
Once on, every SIT, EDM SIT, trainable classifier, and fingerprint SIT can scan images, with no separate classifiers to create
Supported locations include Exchange, SharePoint, OneDrive, Teams, and Windows and macOS devices; each image scanned is one billed transaction, and each PDF page counts separately
Exam tip: OCR is a Global admin task to enable billing, then a Compliance admin task to configure, and it applies to DLP, auto-labeling, records management, and insider risk at once.
Implement and manage sensitivity labels in Microsoft Purview
09
Implement roles and permissions for administering sensitivity labels
Studied
Managing labels is a privileged task, so Purview separates who can create labels from who can use them.
What you need to know
Label administration is granted through role groups such as Information Protection Admin, plus Compliance Administrator and Compliance Data Administrator
Creating and publishing labels, applying labels, and reading label analytics are separate permissions
Follow least privilege: give people the narrowest role group that lets them do their job
Some container and PowerShell-only settings need additional admin roles (for example, SharePoint or Exchange admin)
Define and create sensitivity labels for items and containers
Studied
A sensitivity label records how sensitive an item is and can enforce protection. The first decision is the label's scope.
What you need to know
Scope decides what a label can do and where it appears: Items (files, emails, meetings), Groups & sites (containers), and Schematized data assets
An item-scoped label can encrypt and mark content; a container-scoped label controls the container's privacy and access but does not label the items inside
Labels have a priority order, and only one sensitivity label can be applied to an item at a time
You organize labels top to bottom from least to most sensitive, and can group them into sublabels
Configure protection settings and content marking for sensitivity labels
Studied
This is where a label stops being a tag and starts enforcing protection: encryption and visual markings.
What you need to know
Encryption uses Azure Rights Management and can assign permissions (like Do Not Forward or a custom set), and it travels with the file wherever it goes
Content marking adds headers, footers, and watermarks, and can include variables like the current user or date
Permissions can be assigned now (admin-defined) or let the user choose at apply time
Encryption settings can allow offline access for a set number of days and can set content expiration
Exam tip: Content marking is visible and easy to strip; encryption is the setting that actually restricts access. Know which a scenario needs.
Configure and manage publishing policies for sensitivity labels
Studied
Labels do nothing until they are published to users through a label policy.
What you need to know
A label policy publishes a set of labels to specific users and groups
Policy settings include a default label, requiring a label (mandatory labeling), requiring justification to lower a label, and requiring a label on new items
A user can be targeted by more than one label policy; policy order decides which default and settings win
Publishing changes can take time to reach Office apps
Configure and manage auto-labeling policies for sensitivity labels
Studied
Auto-labeling applies a label without waiting for a user, based on the sensitive content Purview finds.
What you need to know
There are two kinds: client-side auto-labeling (labels or recommends a label inside Office apps as the user works) and service-side auto-labeling policies (apply labels to data at rest in SharePoint, OneDrive, and Exchange)
Service-side auto-labeling policies can run in simulation mode so you see what would be labeled before enforcing
Auto-labeling conditions use sensitive information types and trainable classifiers
A higher-priority label already applied by a user is not overwritten by auto-labeling
Apply sensitivity labels to containers, such as Microsoft Teams, Microsoft 365 Groups, and Microsoft SharePoint sites, and to Power BI items
Studied
Container labels protect the workspace rather than the files in it, controlling who can get in and how they can share.
What you need to know
You must first enable sensitivity labels for containers (a one-time tenant setup) before the group and site settings appear
Container settings include privacy (public or private), external user access, external sharing, access from unmanaged devices, and private team discoverability
Supported containers include Microsoft Teams, Microsoft 365 Groups, SharePoint sites, Viva Engage communities, and Loop workspaces
Items in a labeled container do not inherit the container's label, so combine container labels with item labels and auto-labeling
Exam tip: If the question is about protecting the site or team (who can join, external sharing), it is a container label. If it is about the document itself (encryption), it is an item label.
Implement information protection for Windows, file shares, and Exchange
16
Plan and implement the Microsoft Purview Information Protection client
Studied
The Information Protection client extends labeling to Windows outside of the built-in Office experience, so you can label and protect a wider range of file types from File Explorer and PowerShell.
What you need to know
It runs on Windows only and replaces the older Azure Information Protection (AIP) unified labeling client
Its components are the information protection scanner, the file labeler (File Explorer), the viewer (for encrypted files), and a PowerShell module
It requires a minimum of Microsoft .NET Framework 4.7.2
Labeling built into Office apps is separate; use the client for File Explorer, PowerShell, and file types Office does not cover
Apply bulk classification to on-premises data by using the Microsoft Purview Information Protection scanner
Studied
The scanner discovers and labels sensitive files that sit on-premises, in file shares and SharePoint Server libraries, so on-premises data is protected the same way as cloud data.
What you need to know
The scanner is a component of the Information Protection client and uses the same labels and detection
It crawls file shares (UNC paths) and SharePoint Server document libraries; it does not scan OneDrive as a repository
Discovery mode reports what would be labeled without changing anything; enforcement mode applies labels and protection
It uses IFilters installed on the scanner machine and can run as a multi-node cluster for scale; scanning is scheduled, not real time
Exam tip: For on-premises file servers, the scanner is the answer; for cloud apps like Box or Google Workspace, Defender for Cloud Apps is the answer.
Design and implement Microsoft Purview Message Encryption
Studied
Message Encryption protects email so that only the intended recipient can read it, even when the recipient is outside your organization on Gmail or Yahoo.
What you need to know
It is built on Azure Rights Management and is triggered by mail flow (transport) rules in Exchange
Users can also apply protection manually with Encrypt-only and Do Not Forward options in Outlook
Microsoft 365 recipients get an inline reading experience; other recipients use a one-time passcode or a branded web portal
You can customize the branding of encrypted messages and the portal
Design and implement Microsoft Purview Advanced Message Encryption
Studied
Advanced Message Encryption adds control over encrypted mail after it is sent to external recipients, which is what compliance obligations often require.
What you need to know
It adds message revocation, message expiration, multiple branding templates, and encrypted portal activity logs on top of Message Encryption
Revocation and expiration only work for external recipients who read mail through the encrypted web portal (a branded template forces the portal experience)
You cannot revoke a message a Microsoft 365 recipient read inline in Outlook
Admins configure the automatic policies in the Exchange admin center under Mail flow > Rules, and can revoke with the Set-OMEMessageRevocation cmdlet
Exam tip: Revoke or expire an external email means Advanced Message Encryption plus a custom branding template, not plain Message Encryption.
Domain 2Implement Data Loss Prevention and Retention30-35% of the exam0 / 19 studied
This domain covers stopping sensitive data from leaving (data loss prevention across cloud and endpoints) and keeping data exactly as long as you should (retention and records). Both live in the Microsoft Purview portal, DLP under Data Loss Prevention and retention under Data Lifecycle Management and Records Management.
Create and configure data loss prevention policies
21
Design data loss prevention policies based on an organization's requirements
Studied
DLP detects and protects sensitive items in use, in motion, and at rest. Good design starts from a requirement and picks the right locations and actions.
What you need to know
DLP protects content across Exchange, SharePoint, OneDrive, Teams, Windows and macOS devices, on-premises repositories, Fabric and Power BI, and Defender for Cloud Apps
A policy contains one or more rules; each rule has conditions (what to detect) and actions (what to do)
Actions include blocking, blocking with override, restricting access, encrypting, and notifying with policy tips
Start in simulation or test mode and tune before you enforce, to avoid blocking legitimate work
A DLP rule can use the condition that the user's insider risk level is elevated, so only risky users get the stricter action
Low-risk users keep working normally while the same policy blocks or restricts high-risk users
It is configured in the Insider Risk Management area and then referenced by DLP
Exam tip: Adaptive Protection is the answer when the requirement is to apply stronger DLP only to risky users, automatically, without an admin editing policies.
Create file policies in Microsoft Defender for Cloud Apps by using a DLP policy
Studied
Defender for Cloud Apps file policies extend DLP-style detection and response to connected third-party cloud apps.
What you need to know
A file policy in Defender for Cloud Apps scans files in connected apps and takes governance actions (remove external users, remove public access, apply a label, quarantine)
The preferred inspection method is Data Classification Service, so it uses the same SITs as Purview
File monitoring must be enabled, and at least one app connector must be connected
Note the direction of travel: Microsoft is guiding customers to migrate file policies to Purview DLP and auto-labeling
Configure advanced DLP rules for devices in DLP policies
Studied
Endpoint DLP rules control the specific device actions users can take with sensitive files.
What you need to know
Device activities you can audit or block include copying to USB or removable media, copying to a network share, printing, copying over Bluetooth or RDP, and uploading to unallowed cloud services or browsers
You define allowed and unallowed apps, browsers, and cloud service domains in the policy and settings
Actions can be Audit, Block, or Block with override
Rules can differ by whether the device is on a corporate network or off it
Endpoint DLP has global settings that apply across all device policies, separate from the per-policy rules.
What you need to know
Global settings include file path exclusions, unallowed apps and app groups, unallowed and restricted browsers, network share coverage, and printer and removable-media groups
File path exclusions here stop Endpoint DLP from classifying files in those folders entirely
Settings also control evidence collection (saving a copy of a blocked file to Azure) and business justification text
These settings live under Data loss prevention > Endpoint DLP settings in the Purview portal
Just-in-time (JIT) protection blocks a risky action on a file that has not been classified yet, holding it until evaluation finishes, so a brand-new file cannot slip out before DLP sees it.
What you need to know
JIT audits or blocks egress activities (copy to removable media or network share, print, RDP copy, upload) while classification completes
It needs a recent Defender antimalware client version on the device
The fallback action when classification fails is either Allow users to complete actions or Block users from completing actions; start with Allow and test before blocking
It applies to Windows 10, Windows 11, and the three most recent macOS versions
Exam tip: JIT is the answer when the concern is a new or never-evaluated file being exfiltrated before a policy has a chance to scan it.
Plan for information retention and disposition by using retention labels
Studied
Retention decides how long content is kept and what happens at the end. Retention labels apply retention at the item level and are the basis for records management.
What you need to know
A retention label can retain content, delete it, or retain and then delete after a period
Retention labels are applied to individual items and can start the retention period from creation, last modified, when labeled, or when an event occurs (event-based retention)
Retention labels can mark an item as a record or regulatory record, which adds restrictions
Unlike sensitivity labels, a retention label does not persist if content leaves Microsoft 365
Create, configure, and manage adaptive policy scopes
Studied
A scope decides which locations or users a retention policy or label policy applies to. Adaptive scopes update themselves automatically.
What you need to know
A static scope is a fixed list of locations you pick and must maintain by hand
An adaptive scope uses a query on user, group, or site attributes, so membership updates automatically as attributes change
Adaptive scope types are User, Microsoft 365 Group, and Site
You create the adaptive scope first, then select it when you create the retention or label policy
Exam tip: When a requirement says the policy must automatically follow a department or a set of sites as people and sites change, choose an adaptive scope.
Interpret the results of policy precedence, including using Policy lookup
Studied
When multiple retention settings could apply to the same item, the principles of retention decide the outcome, and Policy lookup shows you which apply.
The principles of retention (in order):
Retention wins over deletion: if anything says to keep the item, it is kept even when another policy says to delete
The longest retention period wins: the item is kept for the longest period any applicable rule specifies
Explicit wins over implicit (for deletion): the delete action from a retention label takes precedence over the delete action from a retention policy
The shortest deletion period wins: among rules that only delete, the item is deleted at the earliest date
Policy lookup, in the Data Lifecycle Management or Records Management solutions, shows which retention policies and retention label policies are assigned to a specific user, site, or Microsoft 365 group
The exam expects you to reason through these four principles for a scenario
Exam tip: Retain always beats delete, and for the delete action a retention label beats a retention policy. Walk scenarios through the four principles in order.
Domain 3Manage Risks, Alerts, and Activities30-35% of the exam0 / 26 studied
This domain is about detecting and responding: insider risk, the alerts and audit trail that let you investigate, and the newer work of protecting data when AI services use it. Insider Risk Management is the largest single topic, and protecting data used by AI is what most sets SC-401 apart from the retired SC-400.
Implement and manage Microsoft Purview Insider Risk Management
40
Implement roles and permissions for Insider Risk Management
Studied
Insider Risk Management (IRM) is built privacy-first, so who can see what is tightly controlled by role groups.
What you need to know
IRM role groups include Insider Risk Management Admins (configure), Analysts (triage alerts), Investigators (open cases and see content), and Auditors
Users are pseudonymized by default, so investigators see anonymized names unless that is turned off
Role-based access control and an audit log keep every action accountable
Assign the narrowest role group that fits each person's job
Plan and implement Insider Risk Management connectors
Studied
Connectors bring in outside signals, most importantly HR events, that make risk detection far more accurate.
What you need to know
The Microsoft 365 HR connector imports events like resignations, terminations, job level changes, and performance notices from a CSV your HR system exports
HR data powers templates like Data theft by departing users and the risky-user templates
Other connectors include healthcare and physical badging connectors for specialized templates
The connector runs a script on a schedule to upload the data and needs the Data Connector Admin role
Forensic evidence adds optional visual capture of risky activity, with privacy controls built in.
What you need to know
Forensic evidence is off by default and creating a policy for it requires dual authorization
Capturing options are specific activities (only when a policy indicator fires) or all activities (continuous, for approved users)
Usernames are pseudonymized by default, and clips are deleted 120 days after capture
Devices must meet requirements and be onboarded for capture to work
Exam tip: Forensic evidence is opt-in, dual-authorized, and privacy-protected; expect a question that tests those guardrails, not just what it captures.
Enable and configure insider risk levels for Adaptive Protection
Studied
Adaptive Protection turns IRM risk levels into automatic action across DLP and retention.
What you need to know
The three insider risk levels are Minor, Moderate, and Elevated
You choose the IRM policy that drives the levels, then define the conditions for each level (based on alerts or specific activity)
DLP policies then apply stricter actions to Elevated users, and retention auto-applies a label to content deleted by elevated-risk users (retained 120 days)
It reduces admin effort because controls follow the user's risk instead of being set per user
Assign Microsoft Purview Audit (Premium) user licenses
Studied
Audit is the record of who did what. Premium adds longer retention and richer events, but only for correctly licensed users.
What you need to know
Audit (Standard) is on by default and retains most logs for 180 days (90 days for logs generated before October 17, 2023)
Audit (Premium) needs an E5 or equivalent add-on license, and you enable the Microsoft 365 Advanced Auditing app for each user
Premium retains Microsoft Entra, Exchange, SharePoint, and OneDrive audit records for one year by default, with custom policies up to 10 years (add-on)
Premium adds crucial events like MailItemsAccessed and higher Management Activity API bandwidth
Respond to Purview alerts in Microsoft Defender XDR
Studied
DLP and other Purview alerts surface in Defender XDR, where they correlate with security alerts into incidents.
What you need to know
DLP alerts appear in the Defender portal under Incidents & alerts, grouped into incidents
Correlation links a DLP alert with related alerts from Defender for Endpoint, Defender for Office 365, and others
You can take remediation actions on users, files, and devices, and hunt across compliance and security logs
Be aware of alert tuning: a built-in rule can convert some DLP signals to behaviors rather than alerts, and you can disable it to keep seeing them as alerts
Implement controls in Microsoft Purview to protect content in an environment that uses AI services
Studied
Purview protects the data that AI tools like Microsoft 365 Copilot can reach, so AI respects the same labels and policies as everything else.
What you need to know
Sensitivity labels and their encryption are honored by Microsoft 365 Copilot: Copilot will not surface content the user is not allowed to open, and it inherits the label on content it references
DLP policies can stop sensitive content from being pasted into or processed by AI where supported
Insider Risk Management includes risky AI usage indicators and a Risky AI usage template
Communication compliance can detect risky prompts and responses
Implement pre-requisites for Data Security Posture Management (DSPM) for AI
Studied
DSPM for AI is the central place to see and control how AI uses your data, but it needs a few things turned on first.
What you need to know
Prerequisites include turning on Microsoft Purview Audit, and for third-party AI sites, installing the Purview browser extension and onboarding devices
It automatically runs a weekly data risk assessment on the top SharePoint sites by usage
You need appropriate compliance permissions, such as the Compliance Administrator role, to use it
DSPM for AI works with Microsoft Copilots, agents, and third-party AI apps like ChatGPT and Gemini
Start a free Azure trial so you have a subscription to experiment with, including the pay-as-you-go features that some Purview capabilities such as OCR rely on.
The Microsoft 365 Developer Program offers an E5 developer sandbox with sample data, so you can build labels, DLP policies, and retention rules without touching production. It is available to qualifying members for development use and now requires a billing account to set up.
The SC-401 is an associate-level exam, so plan for four to six weeks of focused study if you already work with Microsoft 365 and Microsoft Purview. If Purview is new to you, give yourself around eight weeks and start with the free Microsoft Learn paths before moving on to practice tests. The study notes above follow the exam's three domains, so you can pace yourself one domain at a time.
Do I need hands-on experience to pass?
Yes, hands-on time helps a lot, because much of the exam is about configuring Microsoft Purview rather than reciting definitions. If you have a work tenant, practice there; otherwise the Microsoft 365 Developer Program offers an E5 sandbox to qualifying members for development use, though it now requires a billing account to set up. Either way, build sensitivity labels, DLP policies, retention policies, and an insider risk policy so the portal steps feel familiar.
What is the difference between the SC-401 and the retired SC-400?
SC-401 replaced the SC-400 Information Protection Administrator exam and broadened it into the Information Security Administrator role. The core skills carry over, including information protection, data loss prevention, retention, and insider risk, but SC-401 adds a full section on protecting data used by AI services, including Data Security Posture Management for AI. If you studied for the SC-400, focus your refresh on the AI data protection skills.
How often does the SC-401 exam change?
Microsoft updates exam content periodically and lists the current version on the skills measured page, with a change log showing what moved. It is worth checking that page shortly before your exam date, since Microsoft Purview features change quickly. This guide is reviewed against the latest published skills measured, but the Microsoft Learn page is always the source of truth.
What certification does the SC-401 lead to?
Passing SC-401 earns the Microsoft Certified: Information Security Administrator Associate certification. Like other associate certifications, it must be renewed each year through a free online assessment on Microsoft Learn. There are no prerequisite exams, though the SC-900 fundamentals certification is a helpful starting point.
Maintained by Vlad Catrinescu, reviewed September 2026 · All study guides
Subscribe to the Vlad Talks Tech Newsletter
Don't miss out on the latest Microsoft and certification news, conference and
certification discounts, tutorials featuring some of your favorite
Microsoft MVPs, and much more!
Not sure yet? Subscribe and find out why THOUSANDS around the globe subscribe.