Free study notes for every skill the exam measures, plus the books, courses and practice tests I recommend.
By Vlad CatrinescuMicrosoft MVP and MCT · Pluralsight Author
The APL-6006 Study Guide helps you prepare for the Build an agent in Microsoft Copilot Studio Applied Skill. Unlike a traditional certification exam, this is a hands-on assessment lab that validates what you can actually do: building and configuring an agent in Microsoft Copilot Studio, from its knowledge, topics, and tools to publishing and sharing it.
Everything here lines up with the skills Microsoft measures: free Microsoft Learn modules and my own study notes for self-study, plus the courses and the book I recommend when you want to go deeper. No exam dumps, ever.
Time limit
2 hr
Skills measured
5 task groups, 26 skills
Guide reviewed
September 2026
Resources by the way you like to study
5 hand-picked, free and paid
Books
1 resource
Many learners prefer studying from books, which is why Microsoft continues to publish the Exam Ref series. Just keep in mind that books can lag behind exam updates, so always check the publication date and whether the skills measured have changed.
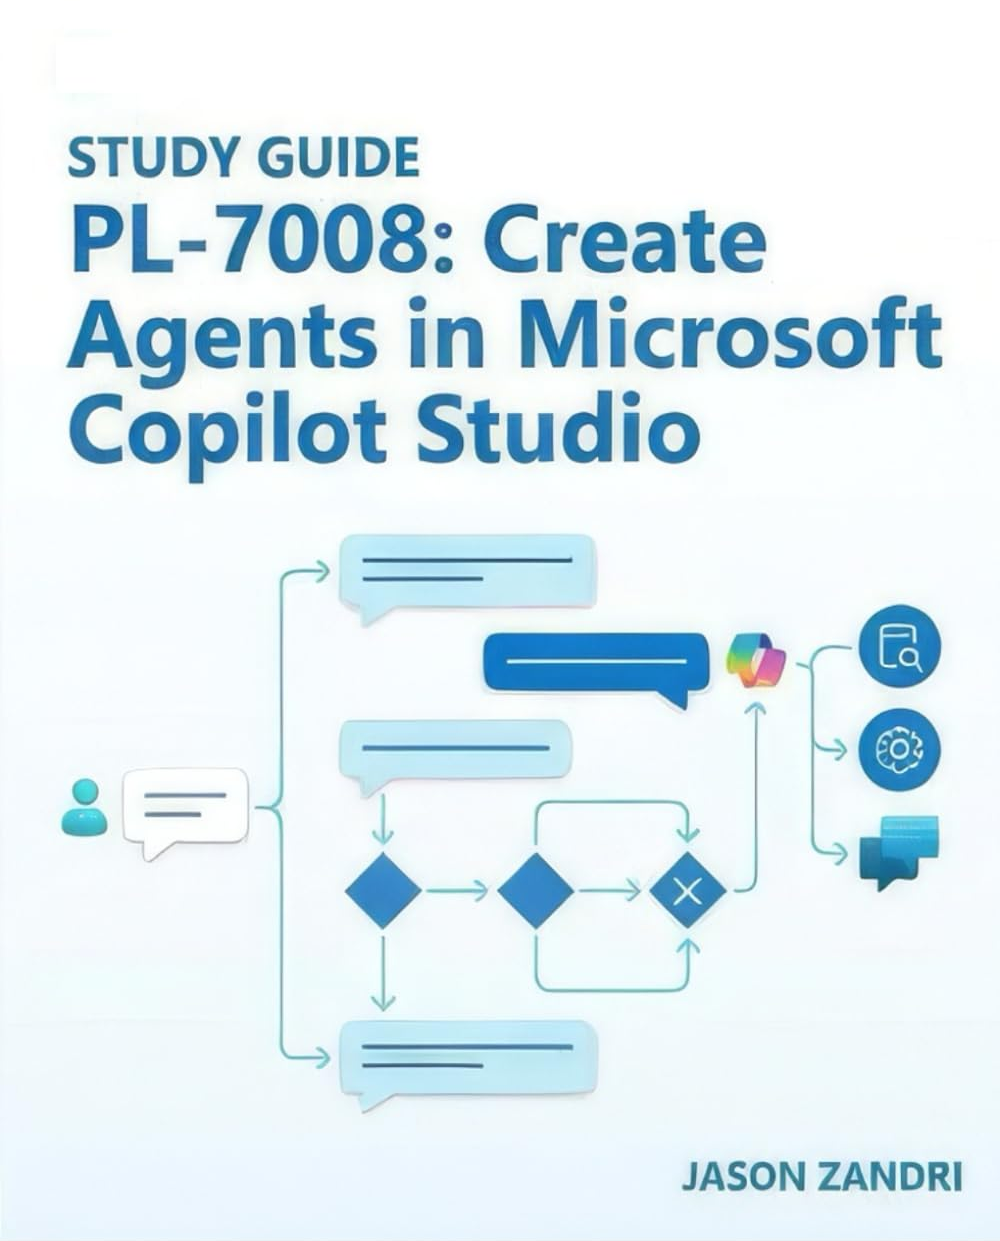
STUDY GUIDE for PL-7008: Create Agents in Microsoft Copilot Studio: Master Microsoft Copilot Studio, Power Virtual Agents, and Generative AI to Build Intelligent, Low-Code Conversational Agents
Unlock the full potential of Microsoft Copilot Studio and Power Platform with this comprehensive PL-7008 study guide. Whether you're an IT professional, Power Platform maker, or solution architect, this book equips you with the skills to design, build, and deploy AI-powered agents that transform business workflows.
On-demand training lets you learn at your own pace, on your own schedule. Whether it's expert-led video courses from platforms like Pluralsight or Udemy, or hands-on modules from Microsoft Learn, you get flexible access to practical, real-world learning when you need it most.
Not all training platforms are the same. Some, like Pluralsight, rely on vetted authors and curated content, while others function as open marketplaces where quality can vary. I only recommend courses that are highly rated and closely aligned with the skills you need, and I still encourage reviewing course details and feedback before enrolling.
Recommended
Getting Started with Creating Agents in Copilot Studio
Free trial
Many organizations want to improve efficiency with conversational AI, but getting started with agents can feel overwhelming. In Getting Started with Creating Agents in Copilot Studio, you'll learn how to design, build, and publish agents that automate conversations and connect to your data. You'll create an agent using topics and knowledge, customize it with variables, messaging nodes, and Power Automate flows, enhance it with generative AI and orchestration, then publish to Teams and other channels and monitor usage with analytics. This course also prepares you for the Microsoft Applied Skill APL-7008: Create agents in Microsoft Copilot Studio.
MS Applied Skill: Create Agents in Microsoft Copilot Studio
This course teaches all of the skills required for the Microsoft Applied Skills: Create agents in Microsoft Copilot Studio. Please note: This course is not affiliated with, endorsed by, or sponsored by Microsoft. In this 2 hour course we'll cover the skills that you need for the APL-7008 Microsoft Applied Skills: Create agents in Microsoft Copilot Studio.
PL-7008: Create agents in Microsoft Copilot Studio
This course will teach you how to build custom agents, manage topics and trigger phrases, configure nodes, manage variables and entities, configure Generative AI, retrieve data from Dataverse, and deploy agents in various channels. This course will allow you to practice your agent building skills by configuring an agent and publishing it to a Teams channel.
Microsoft Learn is a great free way to learn the APL-6006 content. It is mostly text-based articles, with small quizzes at the end of every module.
There is no course page for an Applied Skills assessment, so the learning path below is the one Microsoft lists under Prepare for the assessment on the credential page. When you want one topic rather than the whole path, every skill in my study notes links the exact Microsoft Learn page for it.
Create agents in Microsoft Copilot Studio
Free
The learning path Microsoft lists under Prepare for the assessment on the APL-6006 credential page. It builds an agent from topics, knowledge and generative answers through to publishing, which is what the lab asks you to do.
Some links on this page are affiliate links. If you use them, I may earn a commission at no extra cost to you.
Skills measured and study notes
26 skills, free to study here
0 of 26 studied
APL-6006 is an Applied Skills credential, so it is a hands-on assessment lab rather than a multiple-choice exam. You build a real agent in Microsoft Copilot Studio while the lab watches what you do, which means the fastest way to prepare is to build agents yourself, not to memorize facts. I have broken down every task Microsoft lists below, with plain explanations, the specific settings you touch, and a Learn link for each one. These notes follow the APL-6006 skills measured as Microsoft publishes them, the edition current as of 22 September 2026.
Tip: Do the whole thing in a real environment before you sit the assessment. Create an agent, add knowledge, build a topic with a few nodes, add a tool, then publish and share it. Once you have done the full loop once, the lab feels familiar.
Task group 1Create and configure an agent in Copilot Studio0 / 5 studied
This task group is about getting an agent off the ground and setting its identity. You create the agent, tell it how to behave with instructions, give users a way in with suggested prompts, and set the foundational properties that you cannot easily change later, such as the primary language and the solution it lives in.
Create an agent
01
Create an agent using natural language
Studied
The quickest way to start an agent is to describe what you want it to do in plain language on the Copilot Studio Home page. Copilot Studio reads your description and generates a starting name, description, and instructions, and it suggests knowledge sources, tools, and channels you can accept or dismiss.
What you need to know
You start by selecting the Agent tile on the Home page, or New agent on the Agents page
The description you type can be up to 1,024 characters, and the AI turns it into the agent name, description, and instructions
Suggestions offered during natural language creation do not persist beyond the session unless you accept them
The natural language experience needs a supported environment and language; if it is not available, you can build the agent manually instead
The agent name you enter before the first save sets the read-only schema name, so choose it carefully
Instructions are the natural language guidance that tells the agent how to behave: its role, its tone, the steps it should follow, and the rules it must not break. They are the single biggest lever you have over response quality in a generative agent.
What you need to know
You edit instructions in the Instructions section of the agent's Overview (or Build) page
Instructions can be up to 8,000 characters
Type a slash (/) inside the instructions to insert a reference to a tool, topic, another agent, a variable, or a Power Fx expression
If you created the agent with natural language, instructions are generated for you and you refine them from there
After you change instructions on a published agent, you must publish again for users to see the change
Exam tip: Be specific in instructions about purpose, tone, and boundaries. Vague instructions are the most common cause of an agent that answers off-topic.
Suggested prompts are the ready-made starter questions that appear on the agent's welcome page in Microsoft Teams and Microsoft 365 Copilot, so users know what they can ask before they type anything.
What you need to know
You add or edit them in the Suggested prompts section of the agent's Overview page, then select Save
You can configure up to 10 suggested prompts, each with a title and the prompt text
They appear only in Teams and Microsoft 365 Copilot, and only before a new chat starts; you cannot see them in the Copilot Studio test pane
Copilot Studio can generate suggested prompts automatically from the agent's description and instructions
Publish the agent after editing suggested prompts for the change to reach users
The primary language is the language the agent prefers for its responses. It is one of the identity settings you choose when you create the agent, and it matters because you cannot change it afterward.
What you need to know
Set it in the Agent settings panel (the gear icon) before the first save, on the Agent details tab
You cannot change the primary language after the agent is created; you can only change its region if more than one region is available
To reach more users later, add secondary languages from the agent's Settings > Languages page instead
For a multilingual agent, a published agent matches the user's browser or client language and falls back to the primary language when it cannot
Exam tip: Because the primary language is locked after creation, treat choosing it as a create-time decision, not something you fix later.
A solution is the Power Platform container that packages your agent and its components so you can move them between environments, for example from development to test to production. Choosing the solution at creation keeps the agent and everything you build inside it portable.
What you need to know
Set the solution in Agent settings under Advanced settings, before you save the agent the first time
The solution you pick determines the publisher prefix used in the agent's schema name
Building inside a solution is what lets you export the agent and import it into another environment
Like the schema name, these identity settings become read-only after the first save
Task group 2Configure generative AI and knowledge0 / 7 studied
This task group is where you tune how the agent thinks and what it is allowed to draw on. You set safety and formatting controls on the Generative AI settings page, decide which model powers the agent, control whether it can answer from general knowledge or the web, and connect the enterprise data it should ground its answers in.
Configure generative AI settings
06
Set the content moderation level for an agent
Studied
Content moderation controls how strictly the agent filters potentially harmful content in generative responses. You set the agent-wide default on the Generative AI settings page, and it applies unless a topic or prompt overrides it.
What you need to know
Moderation level
Effect
Higher
Stricter filtering, fewer answers, less risk of harmful content
Lower
More answers returned, higher risk of harmful or off-tone content
The default for the agent-level setting on the Generative AI settings page is High
A generative answers node or a prompt tool can override the agent-level default; at runtime the topic-level setting wins, and if none is set the agent-level setting applies
Moderation levels run from Lowest to Highest on the agent's Generative AI page
Overly strict moderation can cause the agent to return no answer at all, which is worth checking if answers go missing
How the agent shapes and formats its replies is driven by its generative AI settings. With generative orchestration turned on, the agent composes one formatted, cited response from the topics, tools, and knowledge it used, instead of you writing every message by hand.
What you need to know
Generative orchestration is turned on or off in the agent's Settings > Generative AI section, under Orchestration
With it on, the agent generates and summarizes a single response from everything it used in a turn; with it off (classic), you shape replies yourself with message nodes
To keep a topic's wording flexible, return its result as an output variable instead of a final message node and let the agent format the reply
For exact control over the shape of a specific answer, use the agent's instructions or an AI prompt tool, where you can set tone, constraints, and structured output such as JSON
The model behind the agent affects its reasoning depth, response quality, and speed. Copilot Studio lets you choose the model that powers your agent's generative orchestration from a dropdown.
What you need to know
Change the model from the agent's Overview page (or the Build tab components panel), in the Model section
You can switch models at any time, and switching is a save-and-publish change like any other
Experimental and preview models are for testing only, not production; they can be slower, less available, and are billed if users use them
You can also add external models from providers such as Anthropic, Mistral, or xAI when your admin allows them
Separate model settings exist for generative responses, deep reasoning, and the prompt builder
The Allow ungrounded responses setting decides whether the agent may answer from the model's general knowledge, or only from your knowledge sources and tools. Turning it off keeps the agent inside your data.
What you need to know
Find it in the Knowledge section of the agent's Generative AI settings; it requires generative orchestration
When you turn it off, the agent blocks any response generated in a turn where it did not use a knowledge source or tool, and the fallback topic triggers instead
With it off, the agent returns a knowledge answer only when the response includes an in-text citation to the source
Turning it off does not guarantee the model never blends in general knowledge; it only blocks turns that used no source or tool at all
Exam tip: Disabling ungrounded responses is the setting to reach for when the goal is "answer only from our documents, nothing else."
Web search, shown as Use information from the web, lets the agent pull real-time public information from Bing beyond your own knowledge sources. Turning it off keeps the agent from reaching out to the open web.
What you need to know
The setting appears both on the Generative AI settings page and in the Knowledge section of the agent's Overview page
It requires generative orchestration to be turned on
When on, web results are interleaved with results from any public websites you added as knowledge sources
It uses Grounding with Bing Search, so turning it off is the way to stop the agent using open-web content
Knowledge sources ground the agent's answers in your data instead of the model's general knowledge. You can add them when you create the agent or later, at the agent level or inside a topic.
What you need to know
Common sources include SharePoint, Dataverse, public websites, uploaded files, and Copilot connectors
Add knowledge at the agent level on the Knowledge page, or at the topic level with a generative answers node
For SharePoint, generative answers use only modern SharePoint pages and supported file types (Word, PowerPoint, PDF, SharePoint pages)
Without a Microsoft 365 Copilot license in the same tenant, SharePoint files are processed up to 7 MB; with one and semantic search on, up to 200 MB; uploaded files can be up to 512 MB
Better retrieval quality comes from a Microsoft 365 Copilot license in the same tenant as the agent
Generative answers let the agent search your knowledge sources and summarize a conversational, cited response, instead of you authoring a topic for every possible question. You add it as a node inside a topic, often before the Fallback topic.
What you need to know
Add a Create generative answers node from the Advanced node menu in a topic
Point the node at one or more knowledge sources, such as SharePoint, public websites, or a custom data source
Set the node's content moderation level from its Properties pane; the node-level setting overrides the agent default
When searching SharePoint, only the top few results are summarized, so aim the node at content that is relevant and indexed
Custom data sources should include the ContentLocation (URL) and Title fields so the answer can be cited
Task group 3Create and configure topics0 / 8 studied
Topics are the scripted parts of a conversation, made of nodes that each do one thing: send a message, ask a question, branch, redirect, or show a card. This task group tests whether you can shape system topics, create new ones, and wire the common node types together.
Work with topics
13
Modify the Conversation Start topic
Studied
The Conversation Start topic is a system topic that controls the agent's opening message. Editing it is how you set the greeting and any first question the agent asks.
What you need to know
Open it from Topics > System > Conversation Start
The first Message node holds the introductory text users see; you can use variables such as the agent name inside it
You can add nodes below the message, for example an Ask a question node to start a guided flow
If you publish to Teams only and use suggested prompts, consider turning this topic off so the welcome page shows
You can have Copilot build a topic for you by describing what it should do. Copilot generates the trigger phrases and an initial set of nodes, which you then refine.
What you need to know
Go to the Topics page and select Add a topic > Add from description with Copilot
Give the topic a name and describe, in plain language, the questions to ask and the messages to show
Copilot can create Message, Question, and Condition nodes; other node types you add yourself
The generated topic includes trigger phrases based on your description
Copilot does not set advanced node properties such as reprompt or interruption settings; you edit those manually
You cannot delete system topics, but you can turn them off when you do not want their behavior, such as turning off Conversation Start for a Teams-only agent.
What you need to know
System topics can be turned off but not deleted, and you cannot create new system topics
You can edit a system topic's nodes and, for some, its trigger phrases
Turn a topic on or off from the Topics list using the topic's on/off control
Wait until you are comfortable building full conversations before you change system topics, since they support core behaviors like escalation and end-of-conversation
The Question node asks the user something and stores the answer in a variable. What you choose under Identify decides how the agent interprets the reply.
What you need to know
Add it with Add node (+) > Ask a question, then enter the question text
Under Identify, pick how to read the response, for example Multiple choice options or a specific entity
For multiple choice, each option you enter becomes a button and Copilot Studio creates a conditional path for it automatically
The answer is saved in a variable you can rename and reuse later in the topic
Set a variable to Receive values from other topics so a redirect can fill it and skip asking again
A Redirect node hands the conversation from one topic to another without starting over, which lets you build small reusable topics and call them from several places.
What you need to know
Add it with Add node (+) > Topic management > Go to another topic, then pick the destination
By default the conversation returns to the original topic when the redirected topic ends, so you can add more nodes after the redirect
You can pass input variables to the destination topic and receive output variables back
Redirecting to certain system topics (End of Conversation, Goodbye, Escalate, Start over, Confirmed Success, Confirmed Failure) ends the whole conversation instead of returning
An Adaptive Card shows an interactive card with buttons or input fields, which is useful when a plain message or a simple question is not rich enough.
What you need to know
Add it as its own node, or from the tools inside a Message or Question node
Cards can present one or more response buttons and input fields to collect several values at once
If you render a generative answer yourself through a card instead of a Message node, citations are not added automatically; you handle citation rendering
Adaptive Cards with mixed static text and variables need a workaround to localize, so plan for that in multilingual agents
Tools let an agent do things beyond generating text, such as calling a connector, running a Power Automate flow, or using a prompt. This task group tests adding a tool at the agent level and inside a topic, wiring up its inputs and outputs, and pointing the agent's instructions at it.
Add tools
21
Add a tool to an agent
Studied
Adding a tool at the agent level makes it available to generative orchestration, so the agent can decide on its own when to call the tool based on the tool's name and description.
What you need to know
Add it from the agent's Tools page with Add a tool, or from the shared Tools page with Add to agent
Tool types include prompt, agent flow, connector, custom connector, REST API, Model Context Protocol, and computer use
When you add an existing tool to an agent, Copilot Studio wraps it so you can set inputs, outputs, and behavior specific to that agent
With generative orchestration on, a well-described agent-level tool is called automatically when user intent matches; you do not have to wire it into a topic
Exam tip: Add a tool at the agent level when you want the orchestrator to choose it by intent; add it inside a topic when you need deterministic, scripted control.
Adding a tool inside a topic gives you deterministic control: the tool runs at the exact point in the conversation where you place the node, in the order you decide.
What you need to know
Open a topic, select Add node (+), choose Add a tool, then pick a connector, flow, or other tool
You may be asked to create or select a connection for the tool
By default a tool connection uses the end user's credentials; you can change the authentication mode
Use a topic-level tool for scripted flows with an exact order of steps and validations, rather than leaving the choice to the orchestrator
Outputs are the values a tool returns and how the agent responds once the tool finishes. You choose which outputs are available and what the user sees.
What you need to know
Configure what happens next in the tool's Completion section, under After running
Options include Don't respond (the agent folds the output into its own answer), Write the response with generative AI, Send specific response, and Send an adaptive card
A specific response can insert output variables with the variable picker and format them with Power Fx
You can choose which output variables to expose so other tools and the agent can reuse them
Naming a tool in the agent's instructions tells the orchestrator when and how to use it, which makes tool selection more reliable than leaving it to the description alone.
What you need to know
Edit instructions in the Instructions section, and type a slash (/) to insert a reference to the tool
A clear tool name and description are what the orchestrator reads to decide when to call the tool, so keep them specific
Referencing the tool in instructions is how you guide the agent to use it for the right task at the right time
Publish the agent after editing instructions so the change is live
Task group 5Share and publish an agent0 / 1 studied
Microsoft lists a single task in this group, Share an agent, but the group is called "Share and publish an agent" because the two go together: an agent must be published before it can be shared. Publishing makes your latest changes live and turns on the channels where people use the agent, such as a demo website, Teams, and Microsoft 365 Copilot; sharing then grants specific people access. A trial license lets you build and test an agent but not publish it, and newly published changes do not reach conversations already in progress until the user starts over.
Publish and share an agent
26
Share an agent
Studied
Sharing grants other people access to the agent so they can use it, or in some cases test or co-author it. Because an agent must be published before it can be shared, Copilot Studio prompts you to publish first if you have not. You can share with individual users, security groups, or your whole organization.
What you need to know
Publish first: select Publish and confirm (a green banner shows success), then turn on channels such as Teams + Microsoft 365, and Make agent available in Microsoft 365 Copilot to surface it there
Open the agent and select the Share icon near Publish; if the agent is not published you are prompted to publish first
Enter users, email addresses, or security groups, then select Share; people you add start with a Pending status
Set organization access to End user access so anyone in your org can find and use the agent, or restrict it to only the people you specify
Users you share with generally need a Copilot Studio license and Microsoft authentication (Authenticate with Microsoft)
Viewing or editing rights depend on the experience and on Dataverse security roles such as Environment Maker
Exam tip: You cannot share an agent that has not been published, so publish before you share.
A free Microsoft 365 developer subscription with the apps, sample data, and an admin center of your own, so you can build, test, and publish agents without touching a production tenant.
A free Power Platform environment for makers, with Copilot Studio, Power Apps, and Dataverse, so you can practice every APL-6006 task hands-on at no cost.
How is the APL-6006 Applied Skill different from a certification exam?
APL-6006 is an Applied Skills credential, so instead of answering multiple-choice questions you complete hands-on tasks in a live lab that mirrors real work in Microsoft Copilot Studio. It is scored as a pass, not with a numeric score, and there is no proctor. You can learn more on the APL-6006 study guide on Microsoft Learn (opens in a new tab).
Do I need a Copilot Studio environment to prepare?
Yes, hands-on practice is the single best way to get ready, because the assessment is itself hands-on. Sign up for a free Power Apps Developer Plan (opens in a new tab) or a Microsoft 365 trial, then build an agent end to end: create it, add knowledge and a topic, add a tool, and publish and share it.
What is the relationship between APL-6006 and the retired APL-7008?
APL-6006 replaces the earlier APL-7008 Applied Skill. The two cover the same product, Microsoft Copilot Studio, which is why several of the courses and the book below still carry the APL-7008 name; the skills they teach still apply. Study the current task groups on Microsoft Learn to be sure you are covering what APL-6006 measures today.
How long should I study for APL-6006?
If you already have some Power Platform or Copilot Studio experience, a few days of focused, hands-on practice is usually enough. If agents and Copilot Studio are new to you, plan for two to three weeks and start with the free Microsoft Learn modules below. The goal is to be comfortable building an agent without following a script.
Is the APL-6006 assessment free to take?
Yes. Microsoft Applied Skills assessments are free and you take them online through Microsoft Learn. If you do not pass on your first try, you can prepare further and take the assessment again.
Maintained by Vlad Catrinescu, reviewed September 2026 · All study guides
Subscribe to the Vlad Talks Tech Newsletter
Don't miss out on the latest Microsoft and certification news, conference and
certification discounts, tutorials featuring some of your favorite
Microsoft MVPs, and much more!
Not sure yet? Subscribe and find out why THOUSANDS around the globe subscribe.